
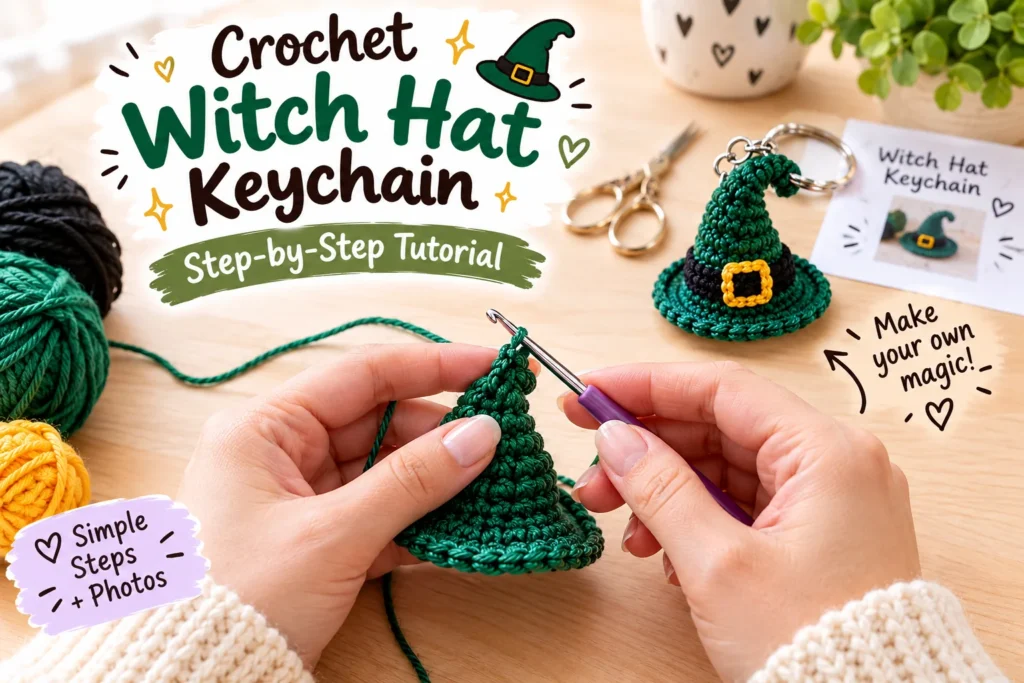
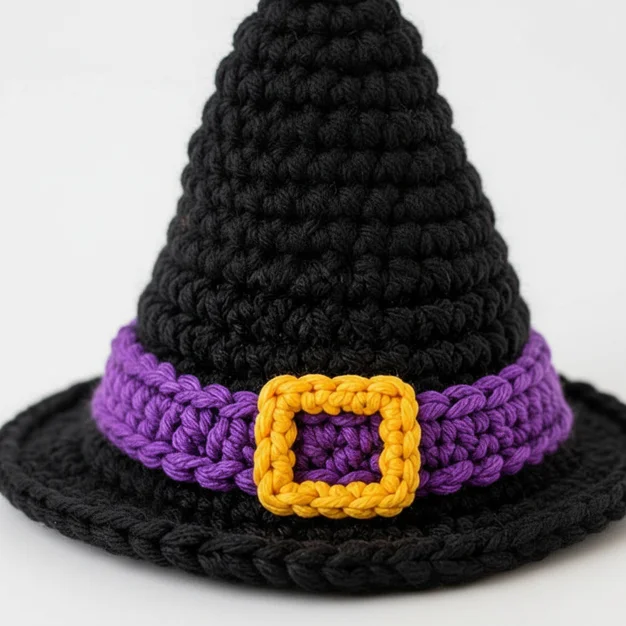
This crochet witch hat pattern is a quick, fun accessory pattern — hey, it’s Sofia from Loop & Twine! a pointed cone-shaped hat with a contrast brim band and a tiny buckle detail, sized to perch on top of most amigurumi animals or a small doll’s head. It’s an original design of mine, not affiliated with or copied from any other pattern designer, and it’s a perfect five-minute add-on once you’ve already got an amigurumi base finished.
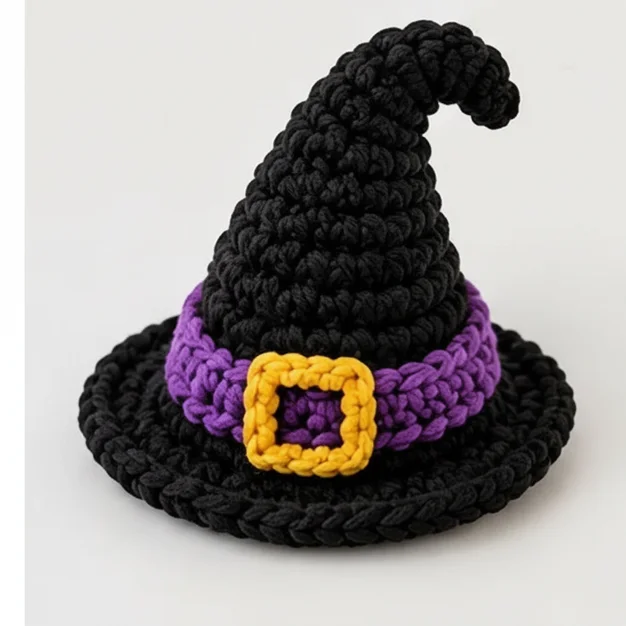
Skill Level & Finished Size
- Skill level: Beginner (magic ring, single crochet, increase, basic sewing)
- Finished size: approx. 3.5 in / 9 cm tall, fits a head circumference of about 4 in / 10 cm — this crochet witch hat pattern works up quickly once you know the basic cone shaping.
- Hook: 2.5 mm
- Time: about 20–30 minutes
Why This Crochet Witch Hat Pattern Works So Well
Most amigurumi hat patterns either sit flat like a beanie or need a wire frame to hold their shape. This one gets its classic witchy silhouette from stitch count alone — a slow, steady taper up top that naturally curls into a point, paired with a sudden flare at the base for the brim. No wire, no stiffener required unless you want an extra-crisp shape.
It’s also genuinely fast. Because the whole hat is worked in a single continuous spiral with no color changes until the band, most crocheters finish the entire cone in under fifteen minutes once they’ve got their tension dialed in. That makes it an easy pattern to batch — useful if you’re dressing up a whole shelf of amigurumi animals for Halloween.
Materials
- Light worsted / DK weight yarn in black (hat body)
- Small amount of purple yarn (brim band)
- Small amount of gold or yellow yarn (buckle)
- 2.5 mm crochet hook
- Yarn needle, scissors
- Optional: a little fabric stiffener or diluted craft glue if you want the hat to hold its cone shape firmly
Abbreviations (US Terms)
MR magic ring · ch chain · sc single crochet · hdc half double crochet · inc increase (2 sc in same stitch) · sl st slip stitch · st(s) stitch(es) · rep repeat · [ ] total stitch count at end of round
New to any of these? Our crochet basics reference guide and magic ring guide cover the fundamentals with photos, and the Craft Yarn Council’s stitch guide is a great official reference too.
Part 1: The Cone (Black)
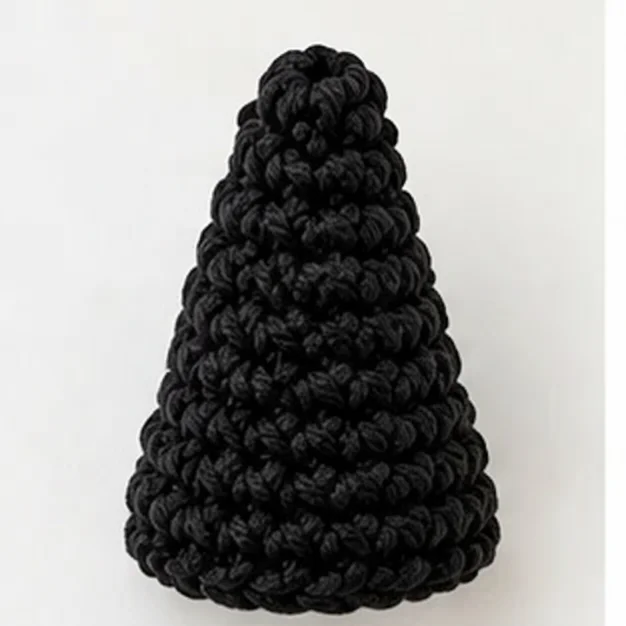
The cone is worked in a continuous spiral from the point down to the brim, increasing gradually so it flares into a classic witch-hat silhouette rather than staying a flat triangle.
- MR, 5 sc in ring. [5]
- Sc around. [5]
- Inc in each st around. [10]
- Sc around. [10]
- (Sc 4, inc) rep around. [12]
- Sc around. [12]
- (Sc 5, inc) rep around. [14]
- Sc around. [14]
- (Sc 6, inc) rep around. [16]
- (Sc 7, inc) rep around. [18]
- Sc around. [18]
- (Sc 8, inc) rep around. [20]
- Sc around. [20]
- (Sc 9, inc) rep around. [22]
- Sc around. [22]
- (Sc 10, inc) rep around. [24]
At this point the cone should curl naturally into a soft point at the top — that curl is normal and gives the hat its classic witchy tilt. Continue with the flared bottom edge:
- (Sc 11, inc) rep around. [26]
- (Sc 3, inc) rep around. [32]
- (Sc 2, inc) rep around. [42]
Fasten off, leaving a long tail. Don’t stuff the cone — it should stay soft and hollow so it sits like a real hat.
Part 2: The Brim Band (Purple)
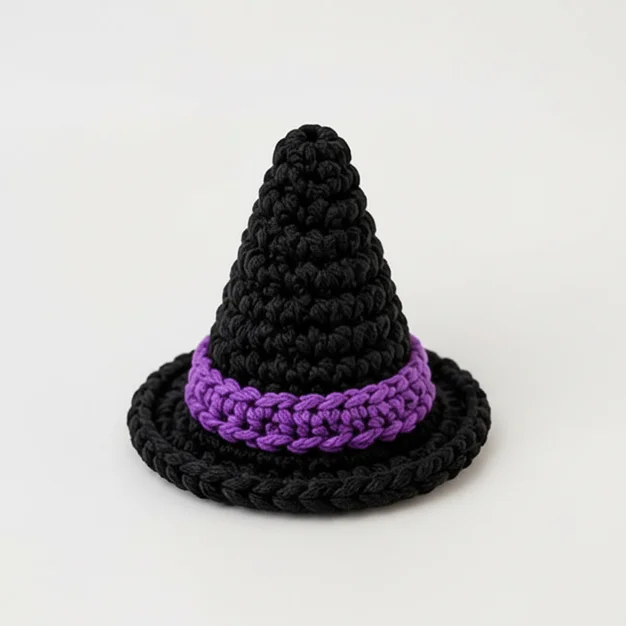
Worked directly into the last round of the cone for a clean, seamless join.
- Join purple with a sl st in any stitch of the cone’s last round. Ch 1, sc in each st around. [42]
- Hdc in each st around (this round flares outward slightly to form the brim edge). [42]
Fasten off and weave in the end.
Part 3: The Buckle (Gold)
A tiny flat rectangle, folded and sewn on to look like a buckle strap.
- Ch 8.
- Starting in the 2nd ch from hook, sc across. [7]
- Ch 1, turn, sc across. [7]
- Repeat row 3 once more. [7]
Fasten off, leaving a tail. You’ll have a small gold rectangle — fold the short ends under slightly so it looks like a buckled strap.
Assembly
- Position the gold buckle rectangle centered on the front of the purple band and sew in place around all four edges.
- Weave in all remaining ends.
- If you’d like the cone to hold a firmer, more upright shape, lightly brush the inside with diluted fabric stiffener or craft glue and let it dry over a cone shape (a rolled-up paper cone works well) before setting it on your amigurumi animal.
Video Tutorial
Watch the full step-by-step video below:
Customizing Your Witch Hat
The black-purple-gold colorway is the classic “spooky” version, but this same construction adapts to almost any occasion:
- Wizard hat: Swap black for deep blue or grey, and use silver thread for the band.
- Birthday party hat: Bright pastel cone with a polka-dot ribbon band instead of a plain buckle.
- Holiday topper: Red and white for a Santa-style hat, or green and red for an elf hat — just skip the buckle.
- Size adjustments: Add one extra increase round early on (Round 3 or 4) for a taller cone, or skip Round 16 for a shorter, stubbier hat that suits rounder amigurumi heads.
Frequently Asked Questions
Does the hat need to be stuffed?
No — leaving it hollow is what lets it sit naturally on a rounded amigurumi head, the same way a real hat rests on hair rather than being packed solid.
Can I make this hat bigger for a full-size amigurumi doll?
Yes — scale up by using a thicker yarn (worsted weight) with a 4mm hook instead of the 2.5mm called for here. Keep the same round-by-round stitch counts; the finished size will grow proportionally with the yarn weight.
My cone won’t curl at the tip — what did I do wrong?
Usually this just means your tension is slightly tighter or looser than the sample. A little extra curl comes from working the last few rounds a touch more loosely; if it still won’t curl, you can shape it by hand while slightly damp and let it air dry.
Does this fit on the lamb keychain or donut keychain patterns?
It’s sized for a roughly 4 in / 10 cm head circumference, which is close to the crochet lamb keychain‘s head size — check the fit before sewing it on permanently, and adjust the band length if needed.
Tips for This Crochet Witch Hat Pattern
- This hat is sized to fit most small amigurumi animals — check the head circumference of your finished animal against the 4 in / 10 cm guide above before starting, and add or skip a round or two on the brim if needed.
- Swap the black/purple/gold palette for any colors you like — the same construction works for a plain wizard hat, a birthday party hat, or a holiday-themed topper.
- If the point of the cone won’t hold its curl, a tiny dab of glue on the inside tip, pinched while it dries, fixes it permanently.
- Weigh down the brim slightly with a drop of glue on the underside if it curls upward instead of sitting flat — a common issue with thinner yarns.
- Make several in a single sitting and keep a small basket of them on hand — they’re one of the fastest add-on accessories to have ready for last-minute gifts.
Troubleshooting
- The brim looks too small or floppy: Work one extra round of hdc after Round 2 of the band for a wider, sturdier brim.
- The buckle keeps twisting out of shape: Press it flat with your fingers before sewing, and tack down all four corners rather than just the top and bottom.
- The hat won’t stay on the animal’s head: A small dot of fabric glue on the inside crown, or a few tacking stitches through the animal’s head fur loops, keeps it secure without gluing permanently.
- Stitch count is off partway through the cone: Use a stitch marker on Round 1 and re-count every few rounds — it’s easy to lose track during the long straight sections.
And there you have it — this crochet witch hat pattern makes a quick little topper to dress up any amigurumi animal for Halloween. If you enjoyed this one, our crochet lamb keychain pattern and bunny & fox donut keychain pattern are two more fast, giftable projects worth trying next.
Reviews
There are no reviews yet. Be the first one to write one.
Happy crocheting! 🎃
— Sofia, Loop & Twine
Looking for another project? Try our Crochet Lamb Keychain Pattern: Curly Wool Amigurumi (Free).
Keep learning: New to a technique used here? See our beginner guide to crochet increases and decreases, an invisible fasten off and how to make a magic ring.