
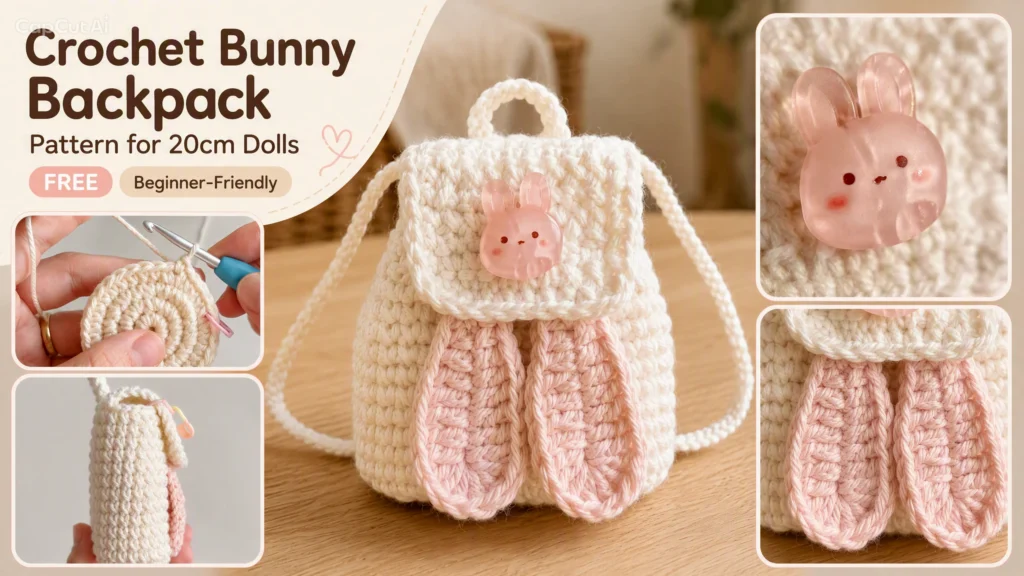
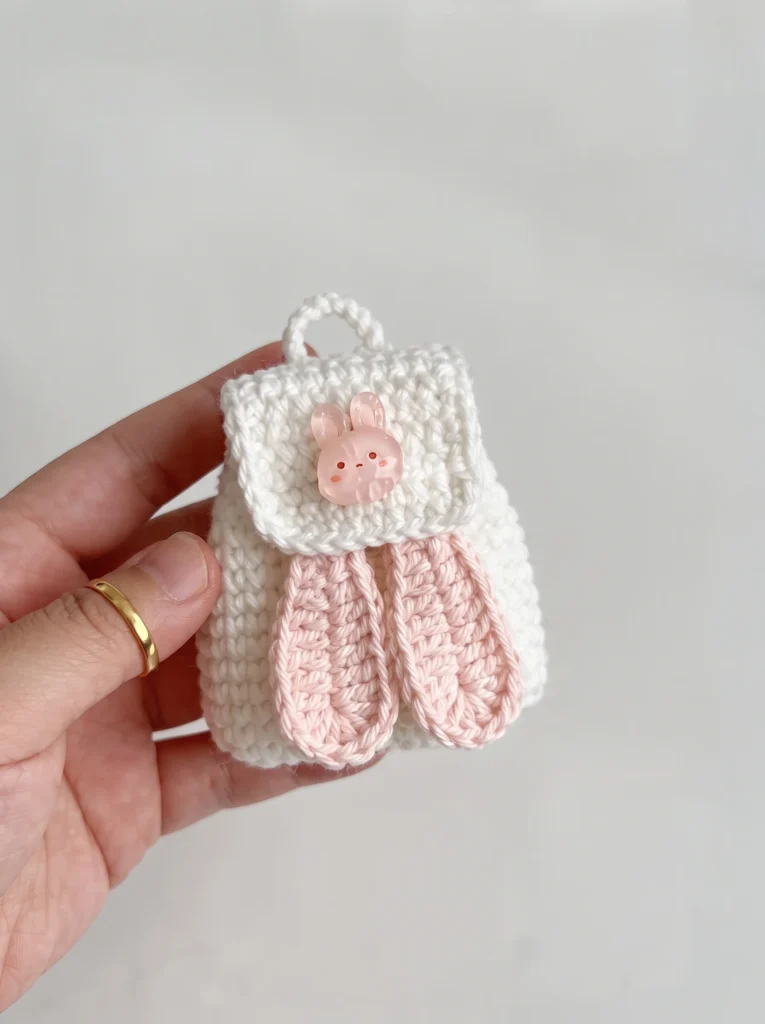
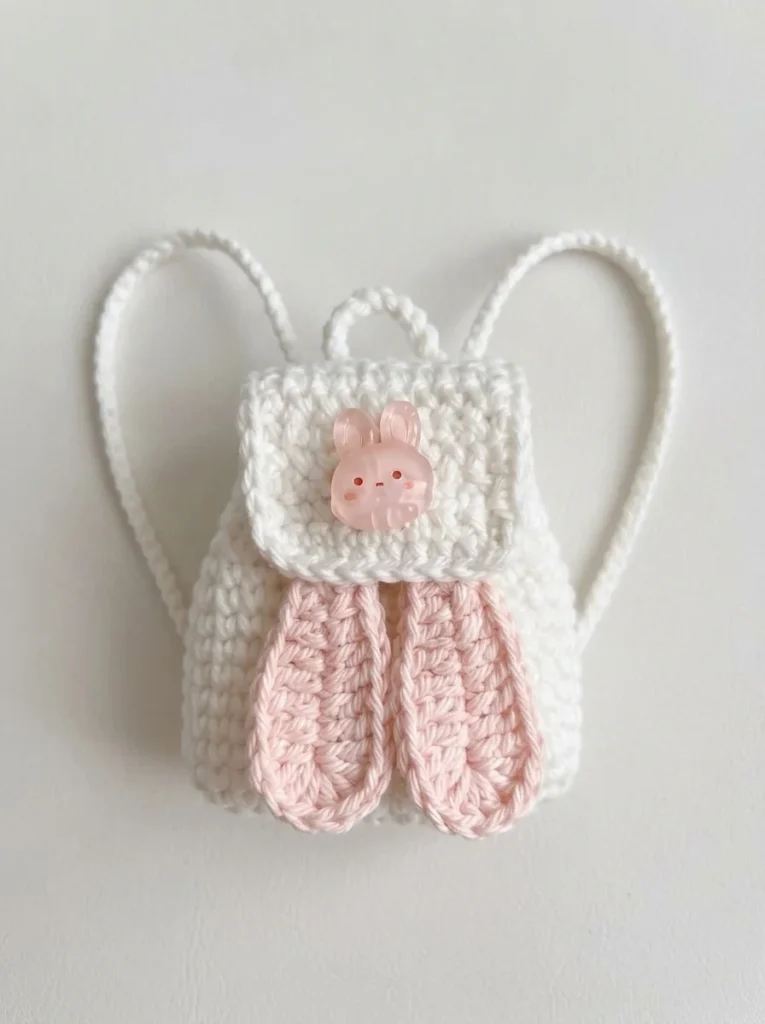
Hey, it’s Sofia from Loop & Twine! This crochet bunny backpack is one of the sweetest doll accessories I’ve designed — a rounded body, two floppy bunny-ear panels on the bottom, a flap with a tiny face button, and a loop handle on top. It’s sized for a 20cm (8″) doll, but the construction is simple enough that a confident beginner can follow along even if this is your first amigurumi accessory.
This pattern uses a magic ring and relies on increases and decreases to shape the backpack — check both guides if you’re new to amigurumi.
Video: How to Crochet the Bunny Backpack
Watch the full pattern come together from start to finish:
Before You Start
- This pattern is worked in joined rounds for the body and flap, and back-and-forth rows for the ears.
- The chain-1 at the start of each round does not count as a stitch.
- Use a stitch marker to hold your place at the join, especially once you’re working the tall body section.
- DK or worsted weight cotton yarn gives the cleanest stitch definition at this scale, but any smooth, non-fuzzy yarn works.
Skill Level & Finished Size
- Skill level: Advanced beginner (magic ring, single crochet, increases/decreases, basic sewing/assembly)
- Finished size: approx. 9 x 7 cm (3.5 x 2.75 in), sized for a 20cm (8 in) doll
- Hook: 2.5 mm
- Gauge: 18 sts x 18 rows = 10 cm (4 in) in single crochet — not critical, but keeps the size doll-appropriate
Materials
- DK weight cotton yarn: white or cream (main body, approx. 15g), pink (inner ears and face accent, small amount), a tiny scrap of brown or black (face details)
- 2.5mm crochet hook
- One small button or safety eye for the face (optional — embroidery works just as well)
- Yarn needle
- Small amount of embroidery floss for the face details
- Stitch marker
- A short length of cord or chain for the handle loop
Abbreviations (US Terms)
MR magic ring · ch chain · sl st slip stitch · sc single crochet · inc increase (2 sc in same stitch) · dec invisible decrease · st(s) stitch(es) · rep repeat · [ ] total stitch count at end of round
New to any of these? Our crochet basics reference guide, magic ring guide, and increase and decrease guide walk through each one in detail with photos and video. If you want the full official abbreviations list too, the Craft Yarn Council’s crochet abbreviations chart is the standard industry reference.
Crochet Bunny Backpack Body — Foundation
We start with a small flat oval that becomes the base of the backpack, then build the walls up from it.
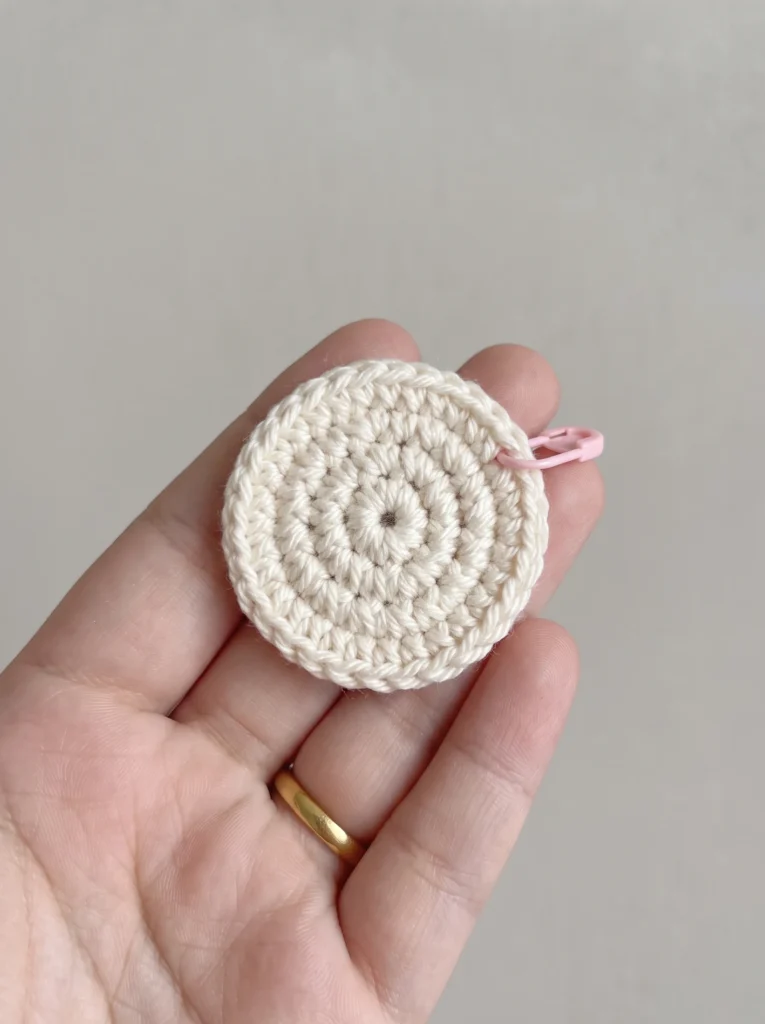
- Round 1: MR, ch 1, 6 sc in ring, join with sl st to first sc. [6]
- Round 2: Ch 1, inc in each st around, join. [12]
- Round 3: Ch 1, (sc, inc) rep around, join. [18]
- Round 4: Ch 1, (2 sc, inc) rep around, join. [24]
Backpack Body — Building the Walls
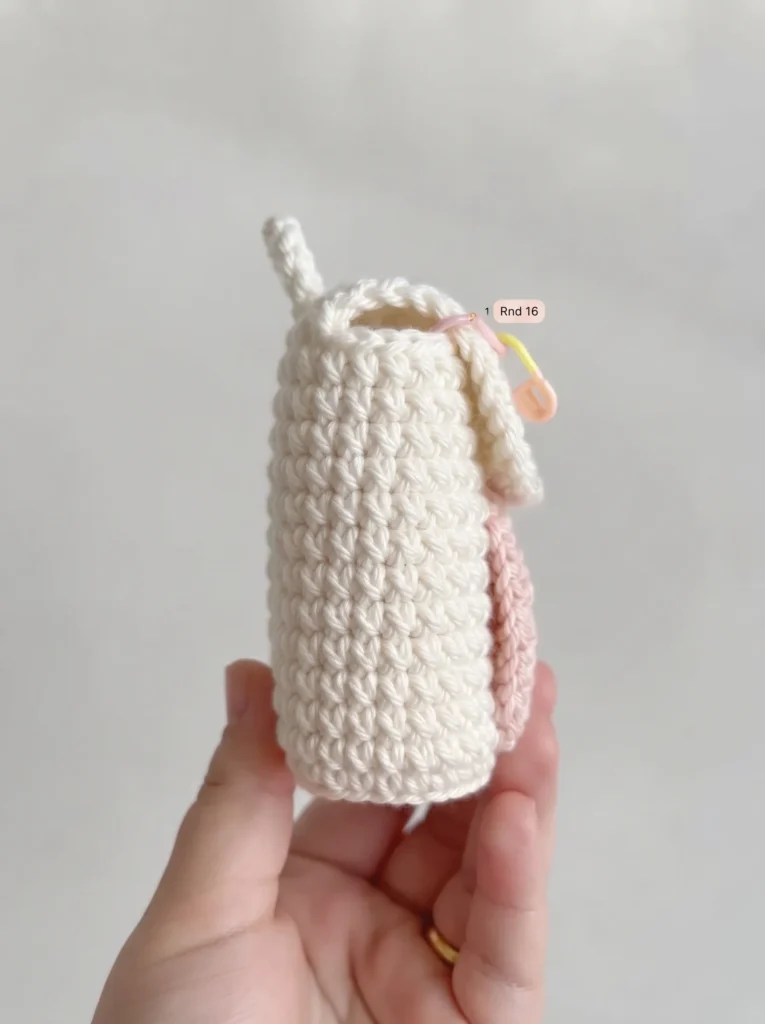
- Round 5: Ch 1, sc in each st around (working into the back loop only of each stitch — this creates a visible ridge that marks where the base ends and the wall begins), join. [24]
- Rounds 6–16: Ch 1, sc in each st around, join. [24] (work this round 11 times — this builds the height of the backpack body)
By the end of Round 16 you should have a small, straight-sided cup shape — this is the main body of the backpack.
Attaching the Bunny Ears to the Base
Instead of a flat bottom, this backpack has two floppy bunny-ear panels hanging from the base — this is what gives it that sweet bunny silhouette in the reference photo. Make these two panels first, then we’ll attach them.
Ear panel (make 2, in white with a pink stripe):
- Ch 6, sc in 2nd ch from hook and each ch across. Ch 1, turn. [5]
- Rows 2–10: Sc in each st across. Ch 1, turn. [5] (work this row 9 times — this makes a long, narrow strip)
- Fasten off, leaving a long tail for sewing.
- Switch to pink yarn and repeat Rows 1–10 to make a matching pink strip for the underside of each ear.
- Lay the white and pink strips back to back and whip stitch around the edges to join them into one flat, two-tone ear panel. Repeat for the second ear panel.
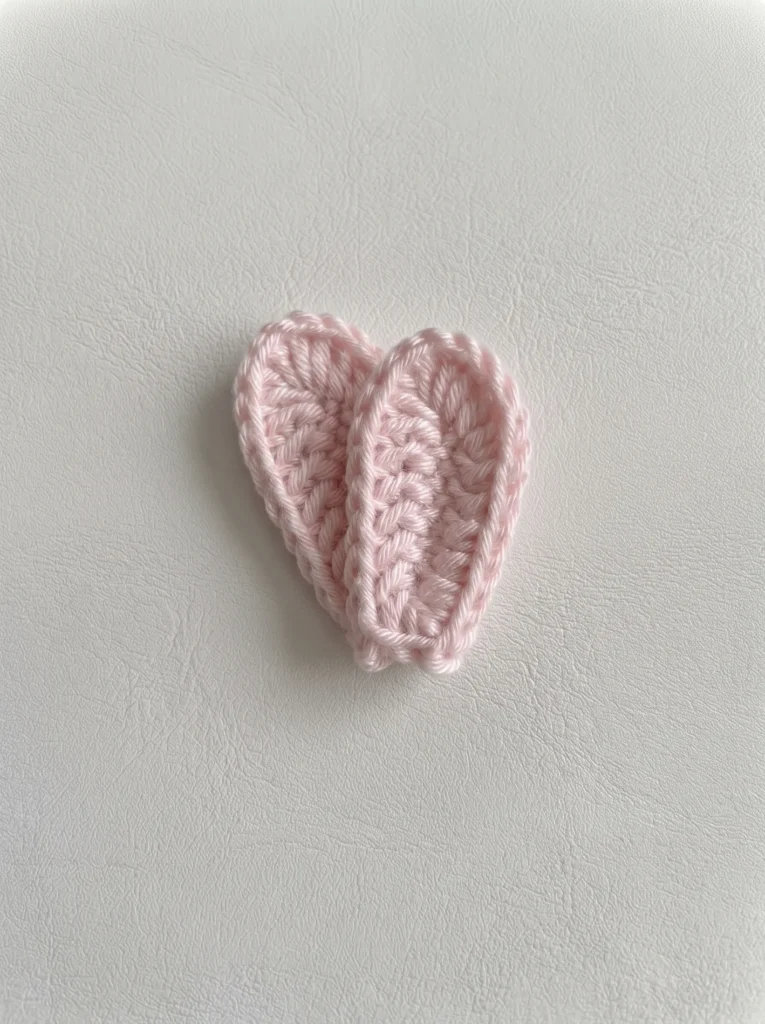
Pin the two ear panels to the base of the backpack body, side by side with a small gap between them (like the legs of the letter A), and sew them on securely around the top edge of each panel using the tail left from Round 4 or a fresh length of yarn.
Backpack Flap
The flap is worked separately as a flat, rounded rectangle, then sewn to the back top edge of the backpack body.
- Ch 9, sc in 2nd ch from hook and each ch across, then continue around the bottom of the chain and back up the other side (this creates a flat oval, working into the starting chain on both sides). [18]
- Round 2: Ch 1, sc in each st around, join. [18]
- Rounds 3–6: Ch 1, sc in each st around, join. [18] (work this round 4 times)
- Fasten off, leaving a long tail for sewing.
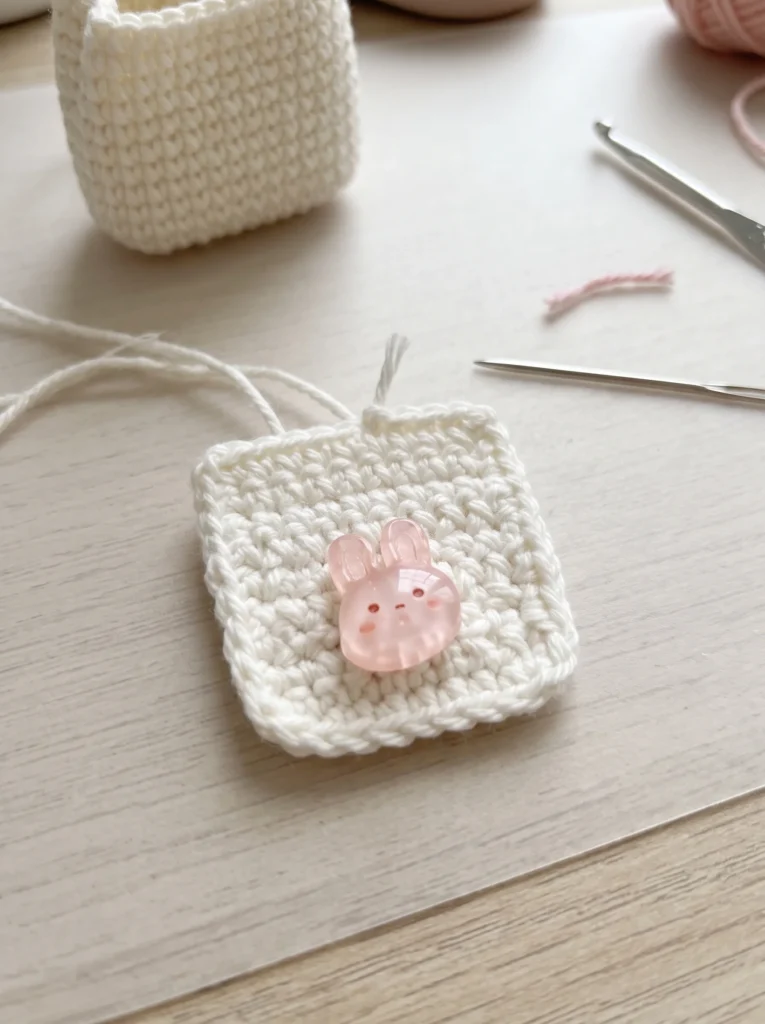
Center the flap over the back top edge of the backpack body and sew it in place along the top edge only, so the bottom two-thirds of the flap hangs free and can fold down over the front.
Face Details
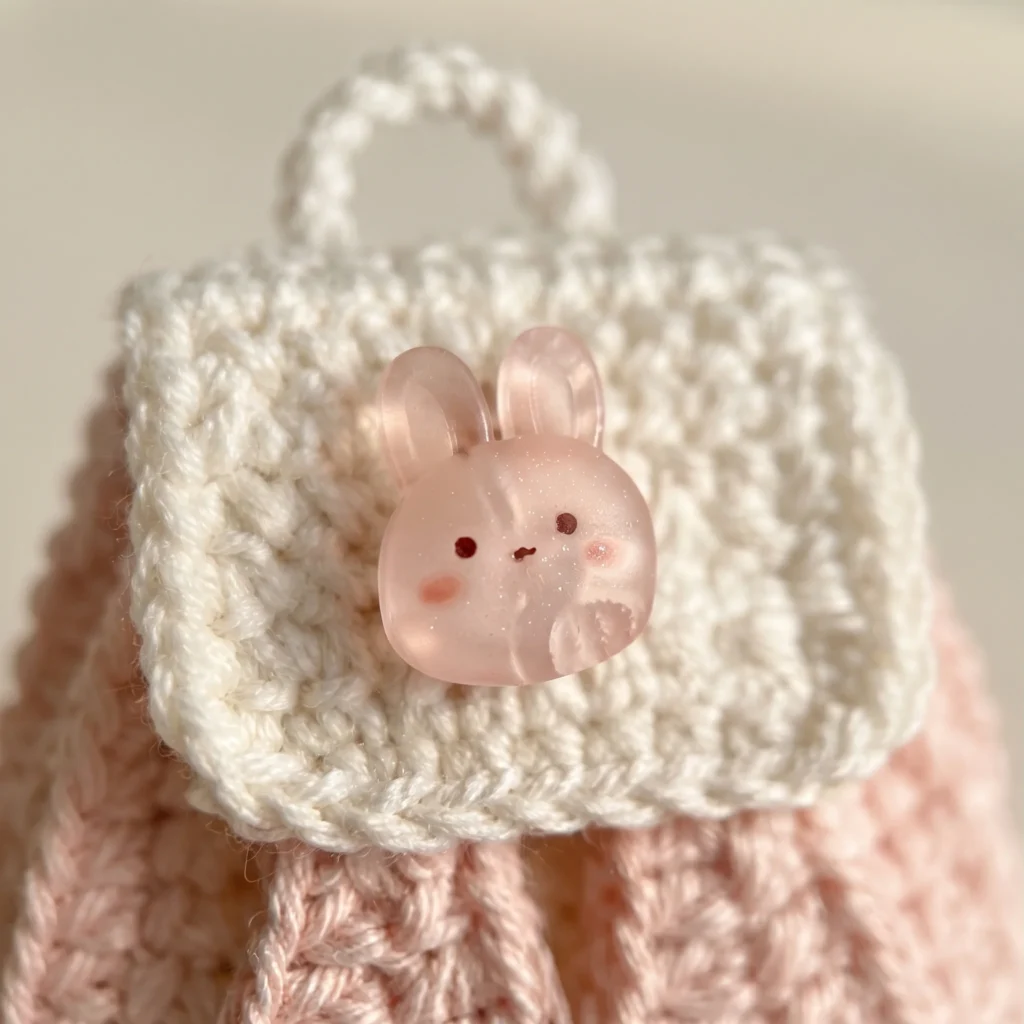
- Face circle (pink): MR, ch 1, 6 sc, join [6]; Round 2: inc in each st, join [12] — fasten off leaving a tail for sewing.
- Center the face circle on the flap and sew around the edge to attach.
- Embroider two small straight-stitch eyes and a tiny nose in brown or black embroidery floss, or glue on a small safety-eye style button instead.
- Optional: attach a small snap or magnetic closure underneath the flap, centered, so the backpack can close securely.
Handle Loop
- Join yarn at the top center back of the backpack, ch 8, sl st back into the same stitch to form a loop, fasten off and weave in the end.
Finishing Touches
- Weave in all remaining ends using a yarn needle.
- If your ear panels feel floppy, a very light stiffening spray or a few small stitches tacking them to the body near the top will help them hold their shape.
- Check that the flap covers the top opening fully when folded down — if it’s a touch short, add one more round to the flap next time before fastening off.
Sizing It Up or Down
- For a smaller version: work fewer rounds in the “Building the Walls” section (try 7–8 instead of 11) and shorten the ear panels to 7 rows instead of 9.
- For a larger version: add 2–3 extra rounds to the walls and 2–3 extra rows to the ear panels, and consider sizing up to a 3.0mm hook with DK weight yarn for a chunkier finish.
And there you have it — a sweet little crochet bunny backpack ready for your favorite 20cm doll. Since this is an original written pattern, feel free to swap the colors to match your doll’s outfit, and make it your own.
This pattern is free for personal use. If you make one, I’d love to see it — tag your finished bunny backpack and share the love for handmade crochet!
Reviews
There are no reviews yet. Be the first one to write one.
Keep learning: New to a technique used here? See an invisible fasten off and the basic crochet stitches.