
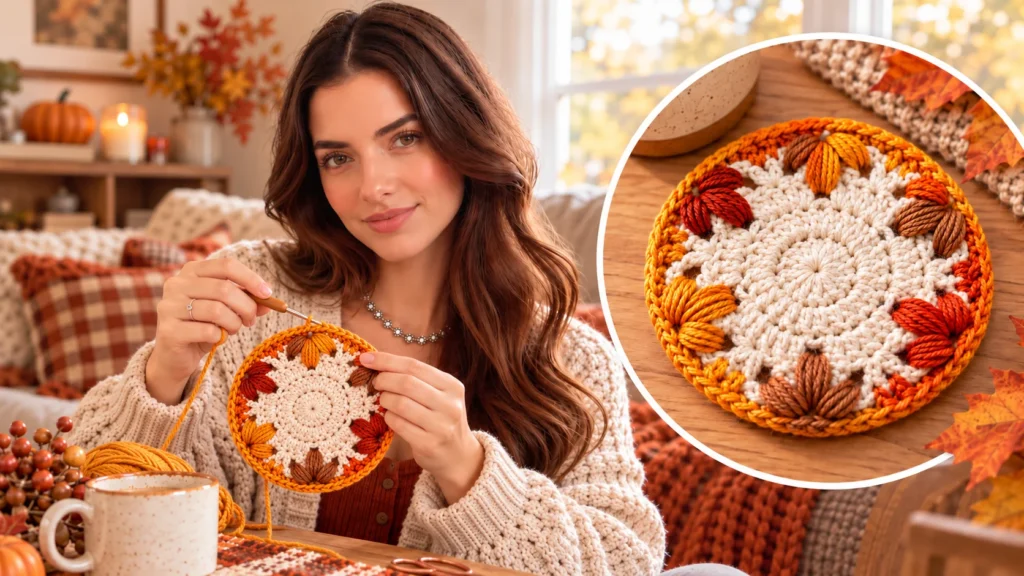
Maple Leaf Crochet Coaster Pattern: Easy 3D Autumn Leaves
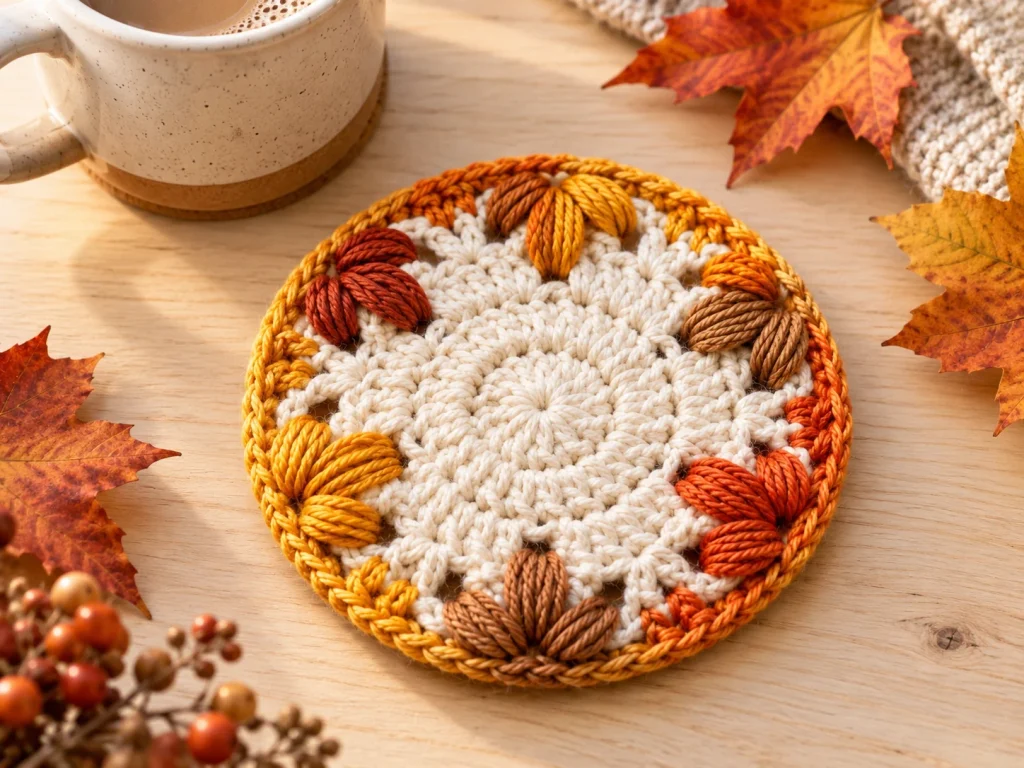
This maple leaf crochet coaster brings warm autumn colors to your table. The cream-colored base is worked in four joined rounds, and the final round creates six raised leaf-like clusters around the edge. This five-round crochet project is a lovely way to practice double crochets, chain spaces, increases, and an eye-catching elongated-loop technique.
Pattern overview: Five joined rounds • Six raised leaf motifs • US crochet terms • Medium-weight yarn • 5 mm and 5.5 mm hooks.
What You Will Need
- Medium (worsted, category 4) yarn in cream for the base
- Small amounts of contrasting autumn-colored yarn for the leaves (or use one color)
- 5 mm (US H/8) crochet hook for the circular base
- 5.5 mm (US I/9) crochet hook for the raised leaves
- Yarn needle
- Scissors
Yarn note: The demonstrated project uses acrylic yarn, but cotton is generally preferable for a practical drinks coaster because it absorbs moisture better. Avoid placing hot cookware on an acrylic coaster.
Crochet Abbreviations (US Terms)
- MR – magic ring
- ch – chain
- sl st – slip stitch
- dc – double crochet
- sp – space
- st – stitch
- 2 dc in same st – double-crochet increase
- leaf cluster – an elongated-loop cluster spanning three spaces, explained below
Important: The beginning ch 2 in Rounds 1–3 is not counted as a dc. Round 4 begins with ch 5, which represents the first dc plus ch 2. Round 5 begins with ch 3, which counts as the first dc.
Quick Pattern Summary
- Round 1: 12 dc into a magic ring.
- Round 2: 2 dc in every stitch (24 dc).
- Round 3: Six groups of (2 dc, 1 dc, 2 dc) with ch-1 spaces between them.
- Round 4: Work dc, ch 2, 2 dc, ch 2, dc, ch 2 across each five-dc group, using stitches 1, 3 and 5.
- Round 5: Work two dc over each central two-dc pair, with ch-4 arches and six raised leaf clusters attached to the adjacent chain spaces.
Step-by-Step Maple Leaf Crochet Coaster Instructions
Step 1 — Round 1: Make the Magic Ring
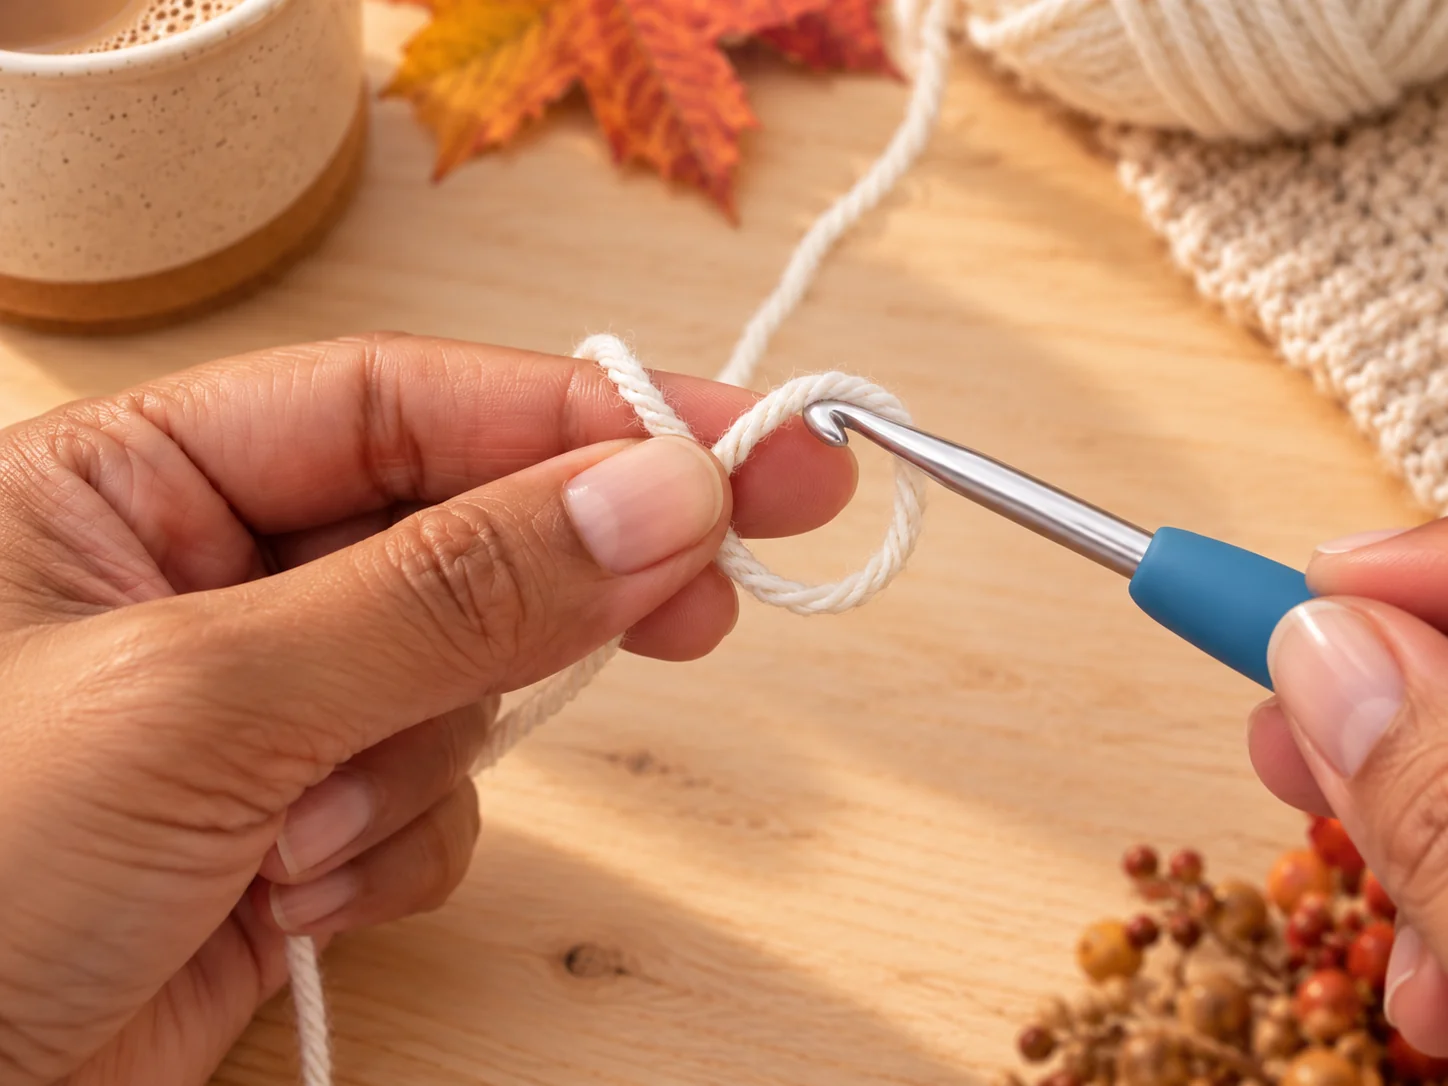
With the cream yarn and 5 mm hook, form a magic ring. Ch 2 (this chain does not count as a dc). Make 12 dc into the ring. Pull the yarn tail to close the center. Skip the beginning ch 2 and join with a sl st into the first dc.
Check: You should have 12 dc.
Step 2 — Round 2: Expand the Circle
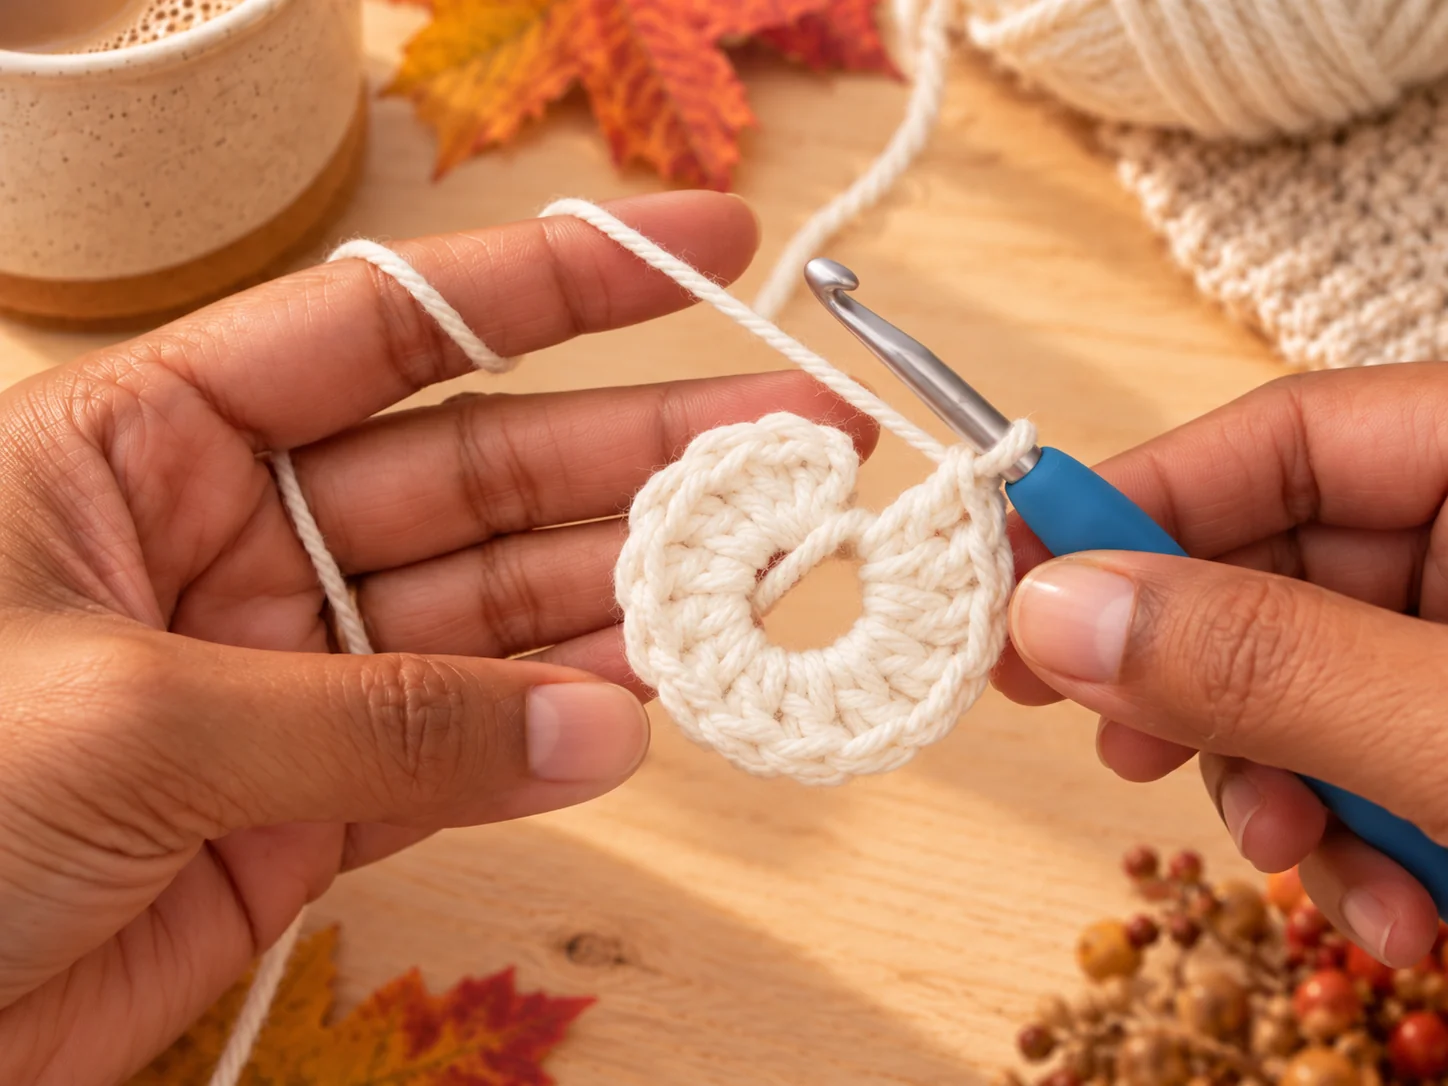
Ch 2 (does not count as a dc). Work 2 dc into each of the 12 stitches around. Skip the starting ch 2 and join with a sl st into the first dc.
Check: 24 dc total. The base should begin to look like a small, flat circle.
Step 3 — Round 3: Make Six Groups
Ch 2 (not counted). Repeat the following six times: 2 dc in the next stitch, 1 dc in the next stitch, 2 dc in the next stitch, ch 1, skip the next stitch. After the sixth group and final ch-1/skip-1, join with a sl st into the first dc (skip the beginning ch 2).
Check: Six groups of five dc = 30 dc, with six ch-1 spaces separating the groups. Each group consumes four stitches from Round 2, so the repeat fits all 24 stitches.
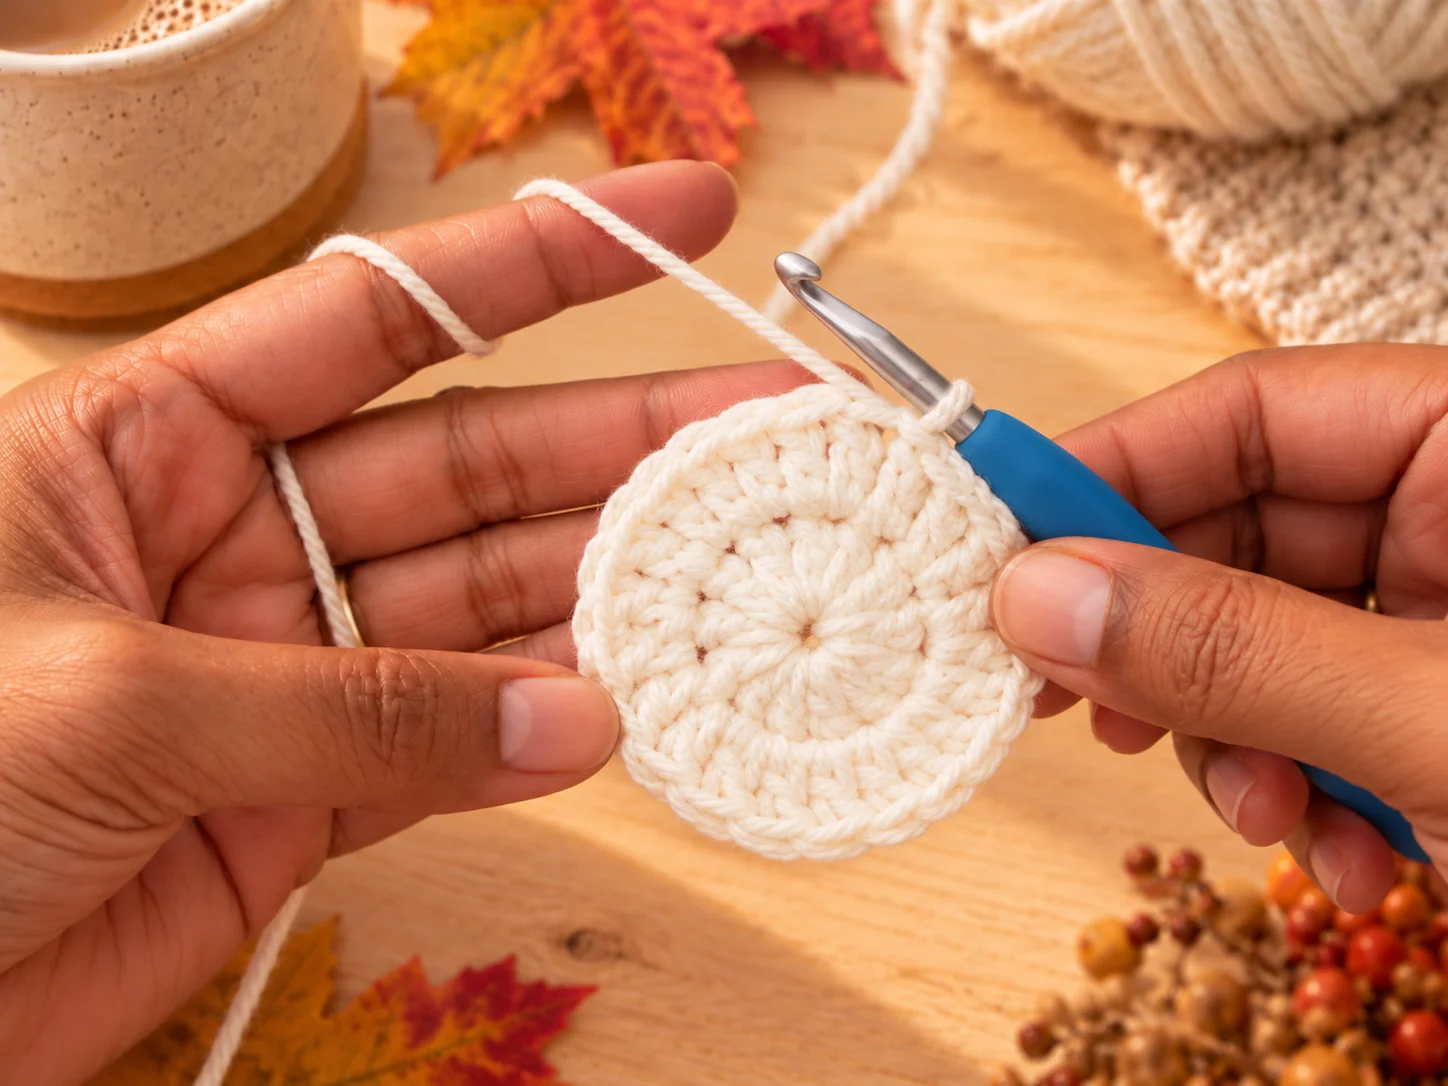
Step 4 — Round 4: Build Chain Spaces for the Leaves
The five dc in every Round-3 group are counted as positions 1, 2, 3, 4 and 5. You will work only into positions 1, 3 and 5 in each group. Start with ch 5, which counts as a dc in position 1 of the first group plus ch 2. In position 3 of that group, work 2 dc, then ch 2. In position 5, work 1 dc, then ch 2.
For each of the five remaining groups, repeat: 1 dc into position 1, ch 2, 2 dc into position 3, ch 2, 1 dc into position 5, ch 2. Join with a sl st into the third chain of the beginning ch 5. Cut the cream yarn and fasten off.
Check: Six groups × four dc = 24 dc equivalents (including the starting ch 3 as the first dc), and 18 ch-2 spaces. In each group, two ch-2 spaces flank the center two-dc pair; these are important for the raised leaves.
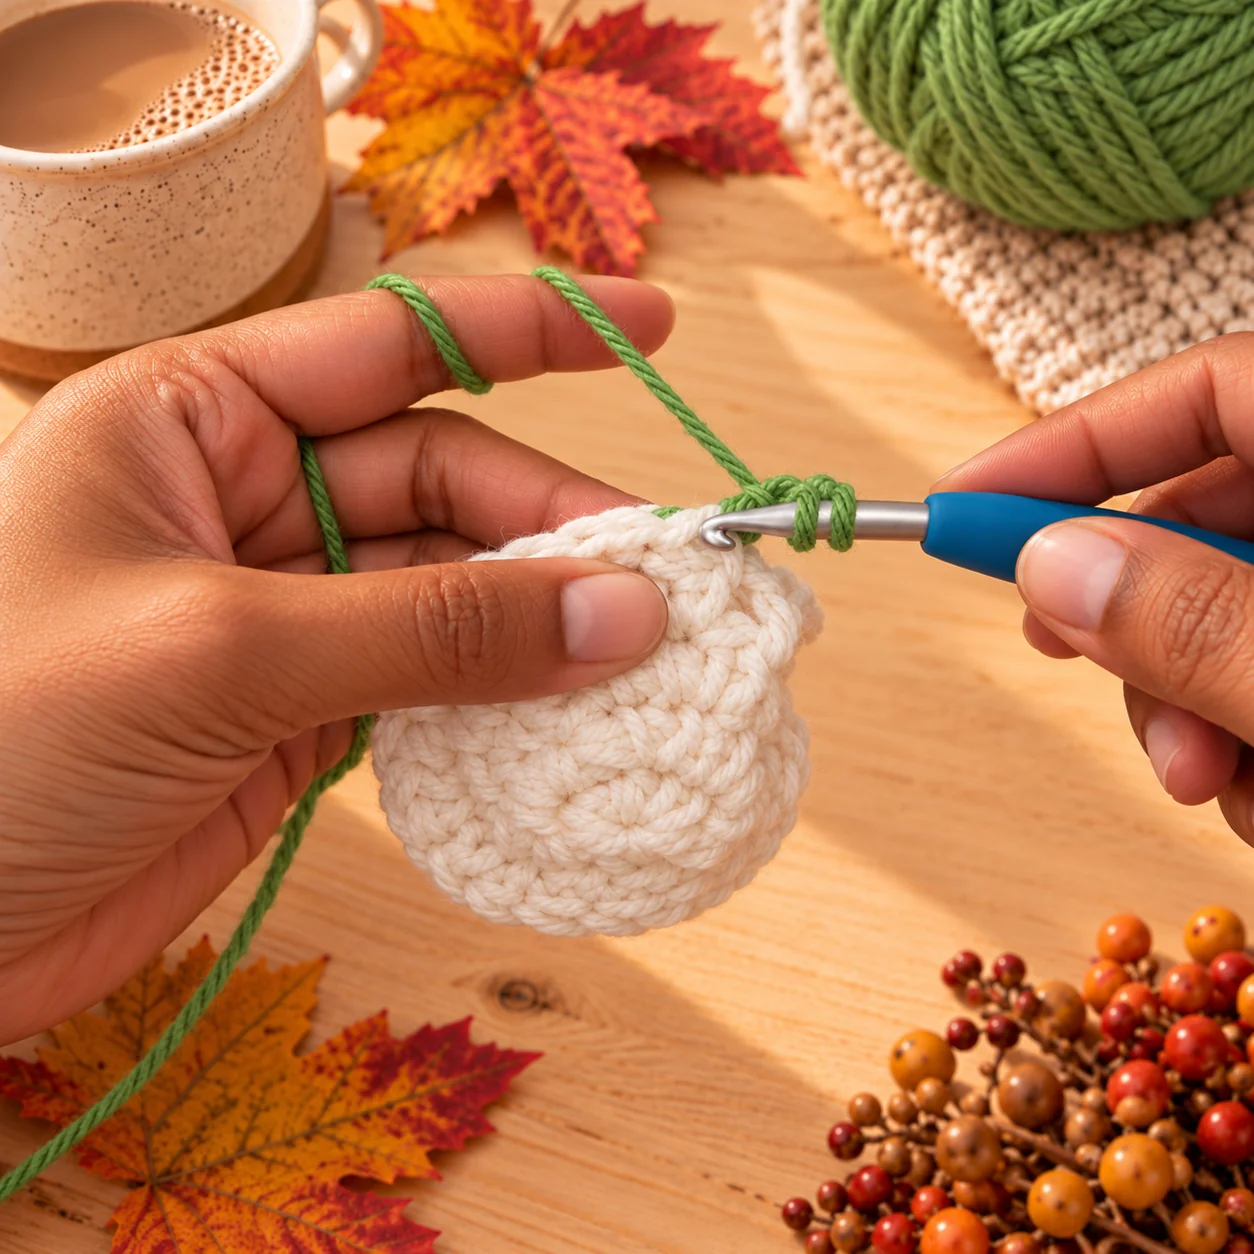
Step 5 — Round 5: Crochet the Six Raised Leaves
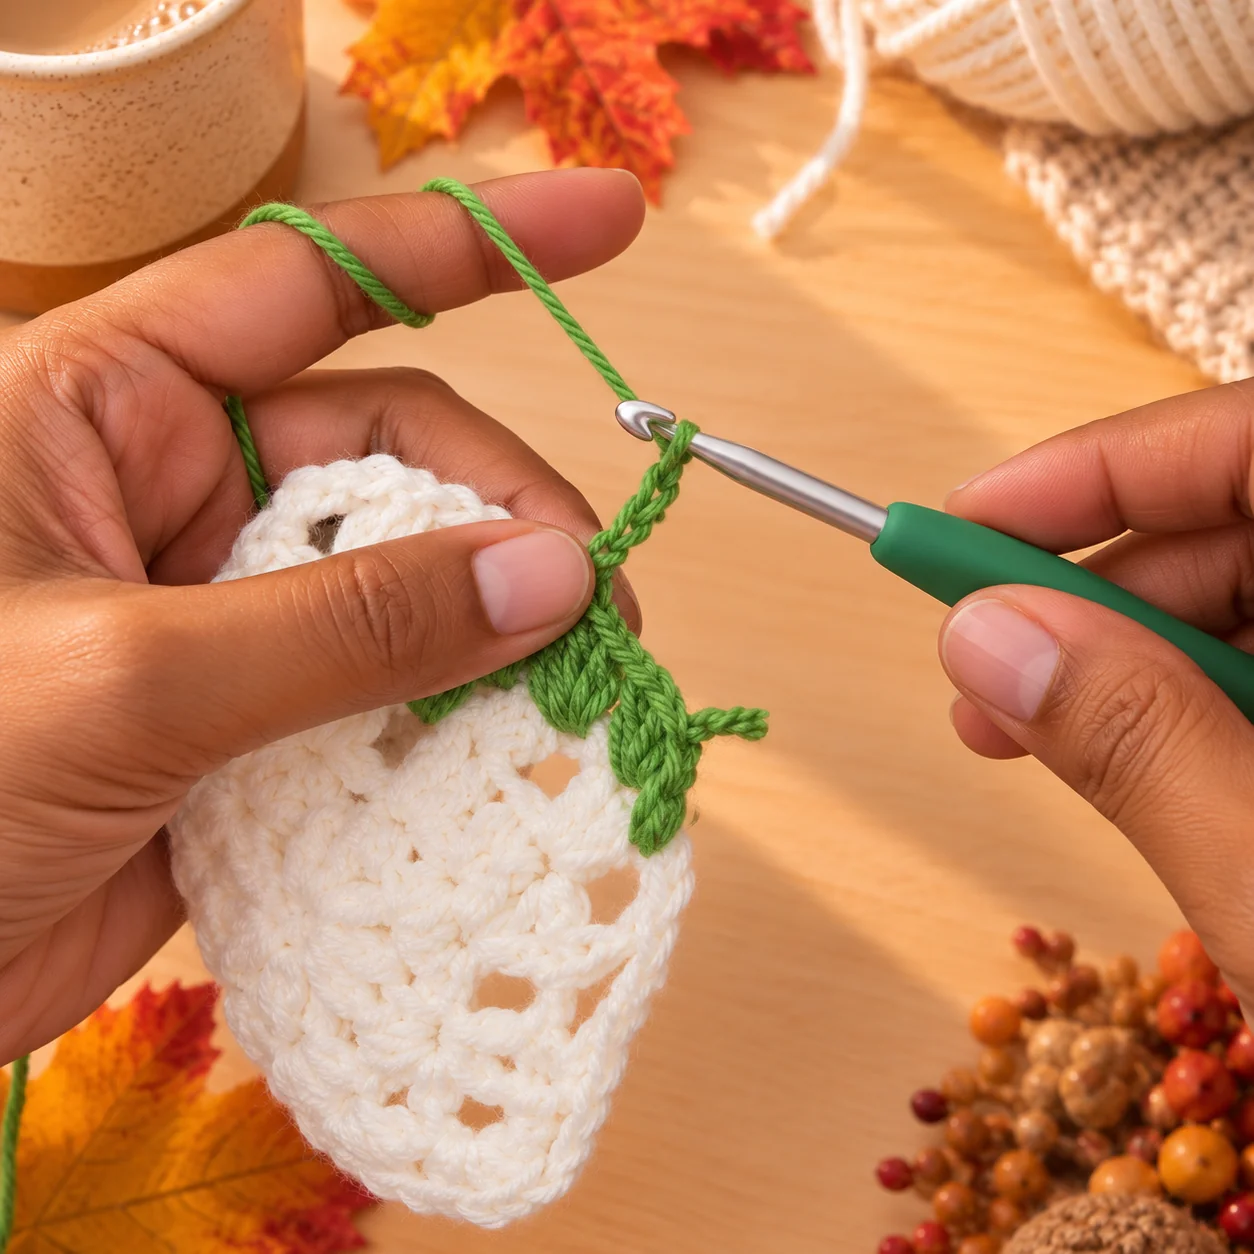
Change to the 5.5 mm hook and a contrasting leaf color. Rejoin the yarn at one of the central two-dc pairs of Round 4. Ch 3 (counts as the first dc) and make 1 dc into the second stitch of the pair. Ch 4, then make the raised leaf cluster described below. Ch 4, then work 1 dc into each stitch of the next central two-dc pair. Continue with ch 4, leaf cluster, ch 4, two dc around until all six leaves are complete.
After the final leaf, ch 4 and join with a sl st into the third chain of the beginning ch 3. Cut the yarn and weave in the ends. You should have six raised leaf clusters.
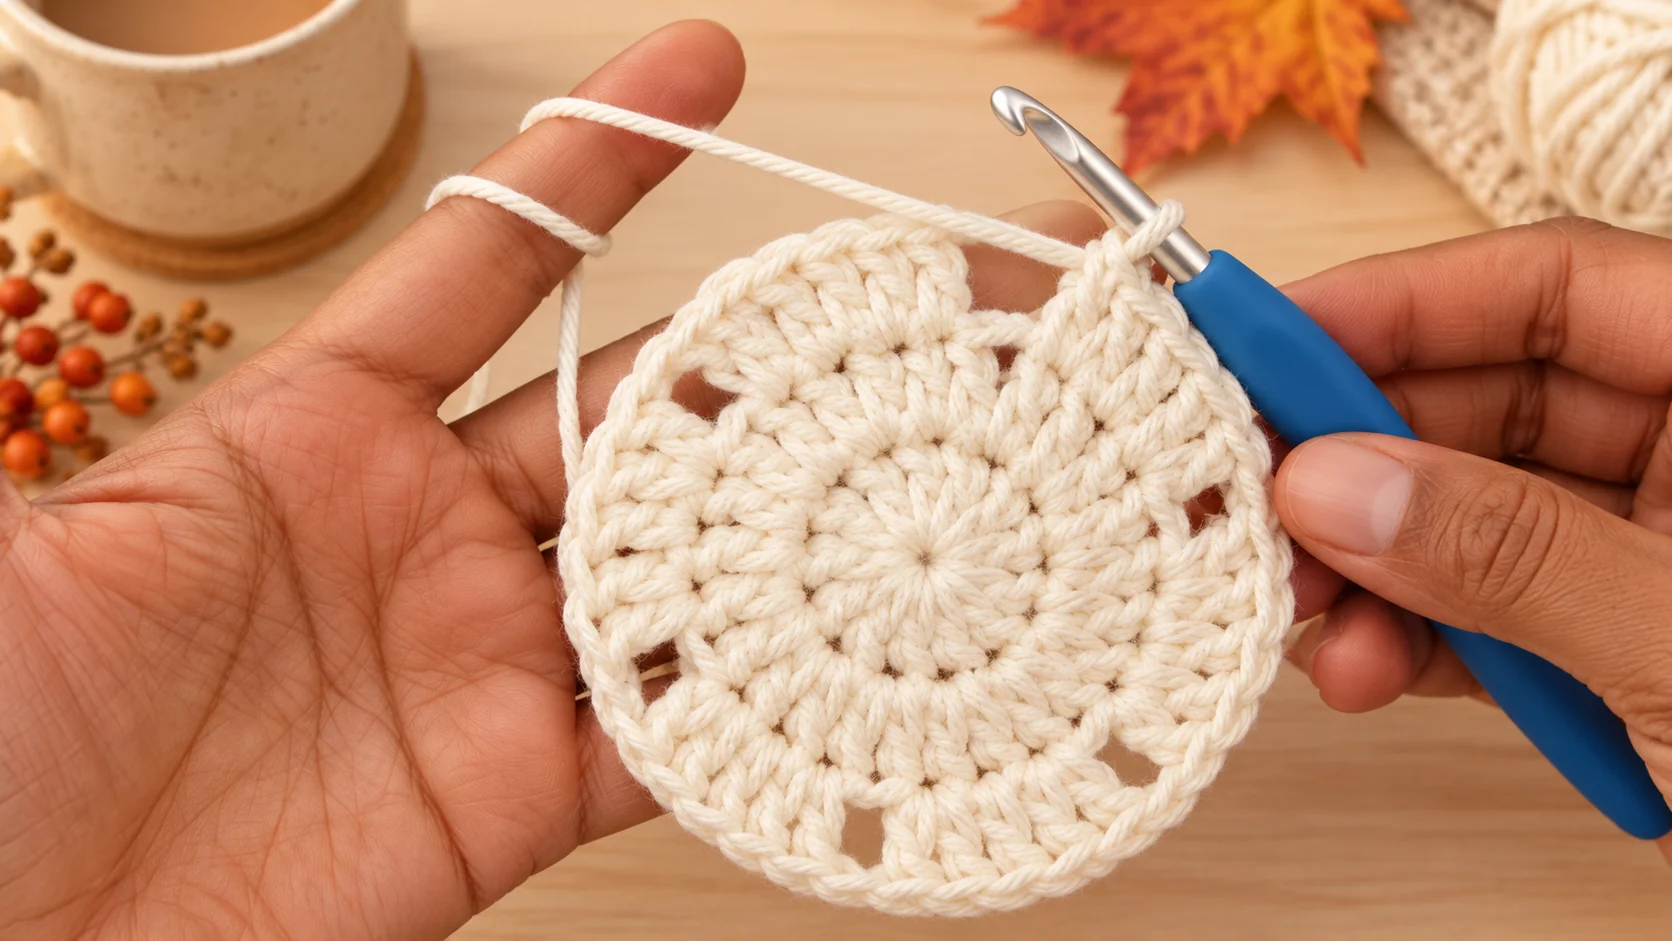
How to Make One Raised Leaf Cluster
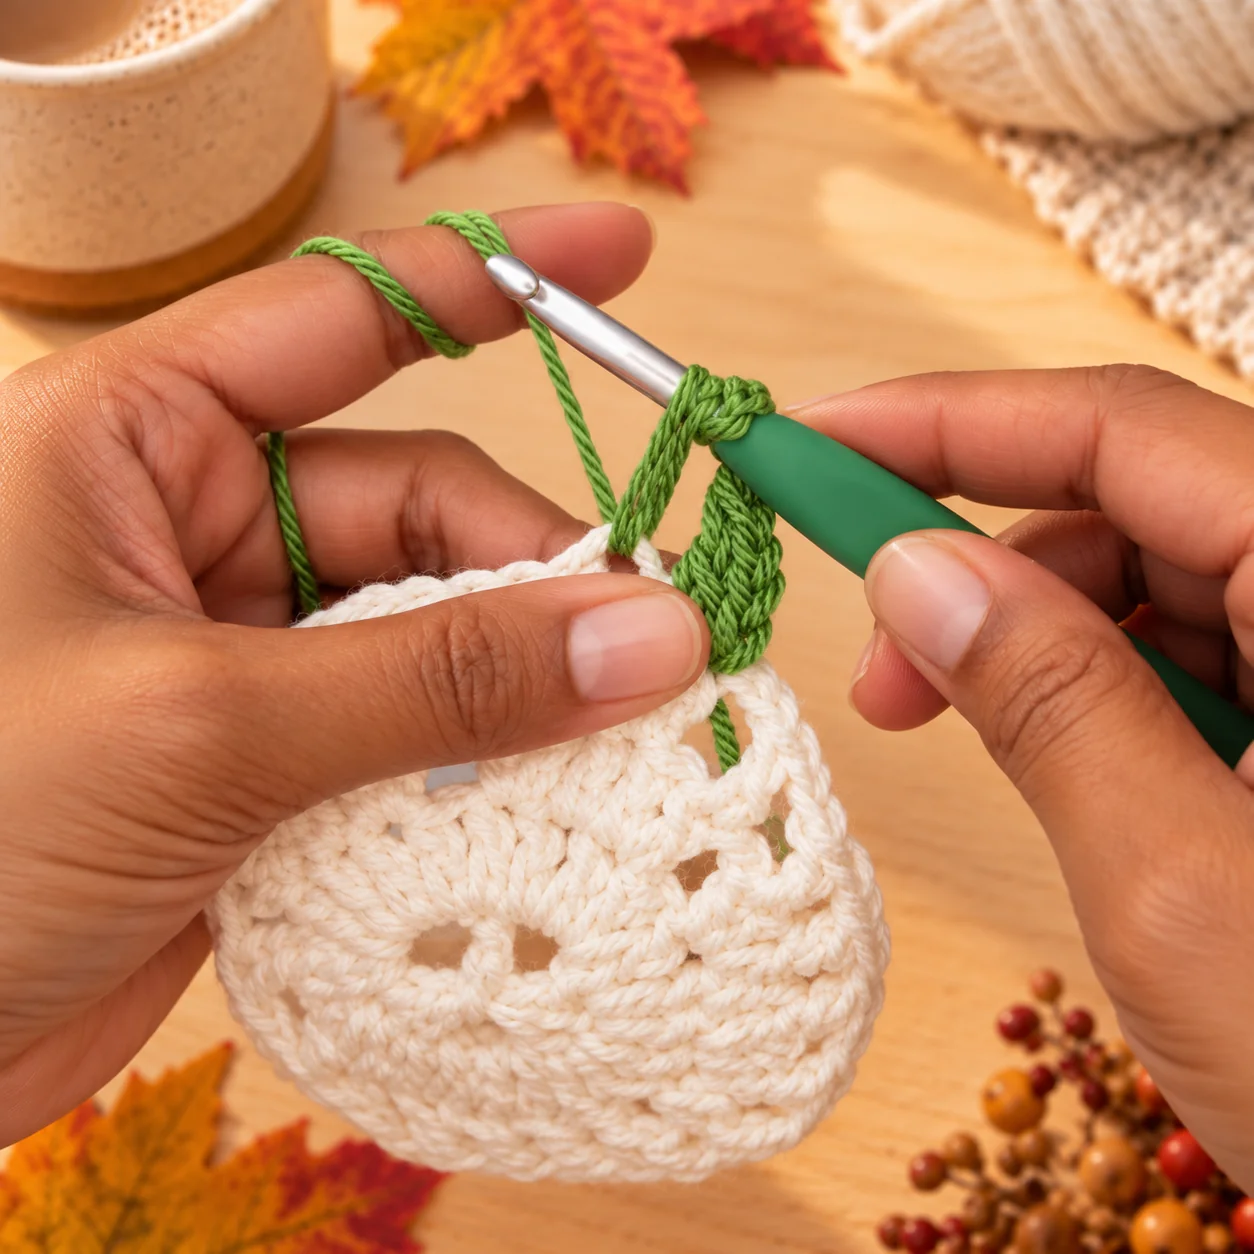
Each leaf uses three nearby openings: the first ch-2 space of its Round-4 group, the lower ch-1 space from Round 3, and the second ch-2 space from Round 4. Work the following into these spaces in order without completing separate stitches:
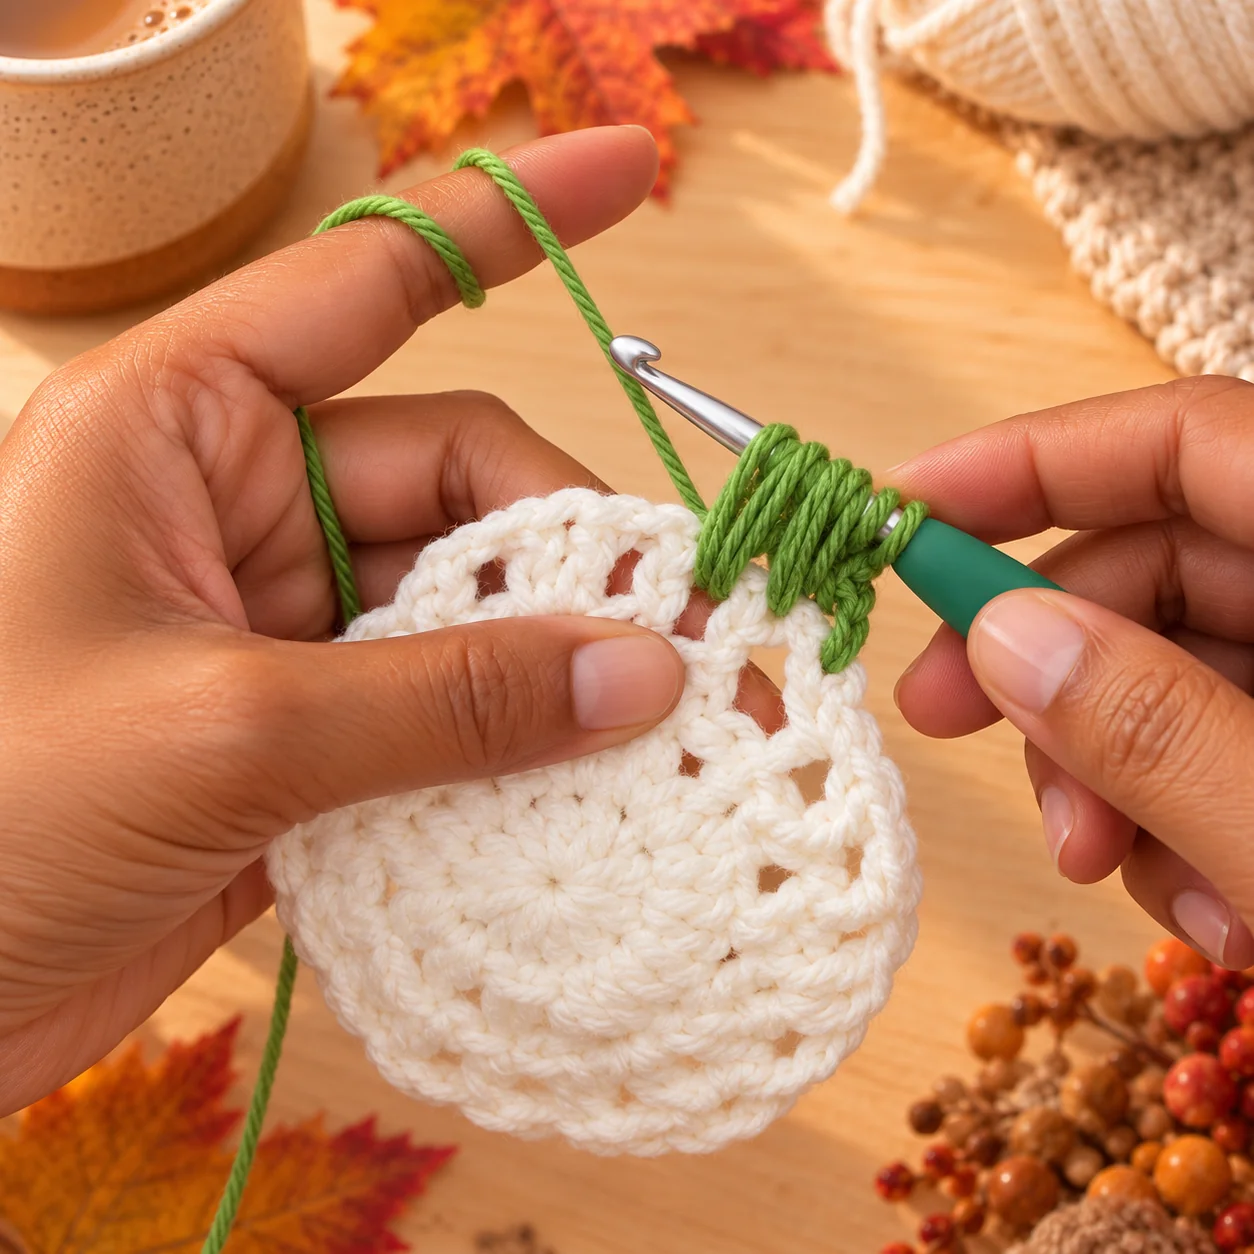
- First Round-4 ch-2 space: Yarn over, insert hook and draw up a long loop. Repeat four times total.
- Lower Round-3 ch-1 space: Yarn over, insert hook and draw up a long loop. Repeat four times total.
- Second Round-4 ch-2 space: Yarn over, insert hook and draw up a long loop. Repeat four times total.
- Finish: Yarn over and carefully draw through all the accumulated loops (in manageable stages if necessary). Draw through again to secure/lock the cluster.
This makes 12 elongated pull-ups in total per leaf (4 + 4 + 4). Keep the pull-up heights consistent so the three-section leaf opens evenly. Do not treat the three sections as separate finished puff stitches; they are closed together into one raised motif.
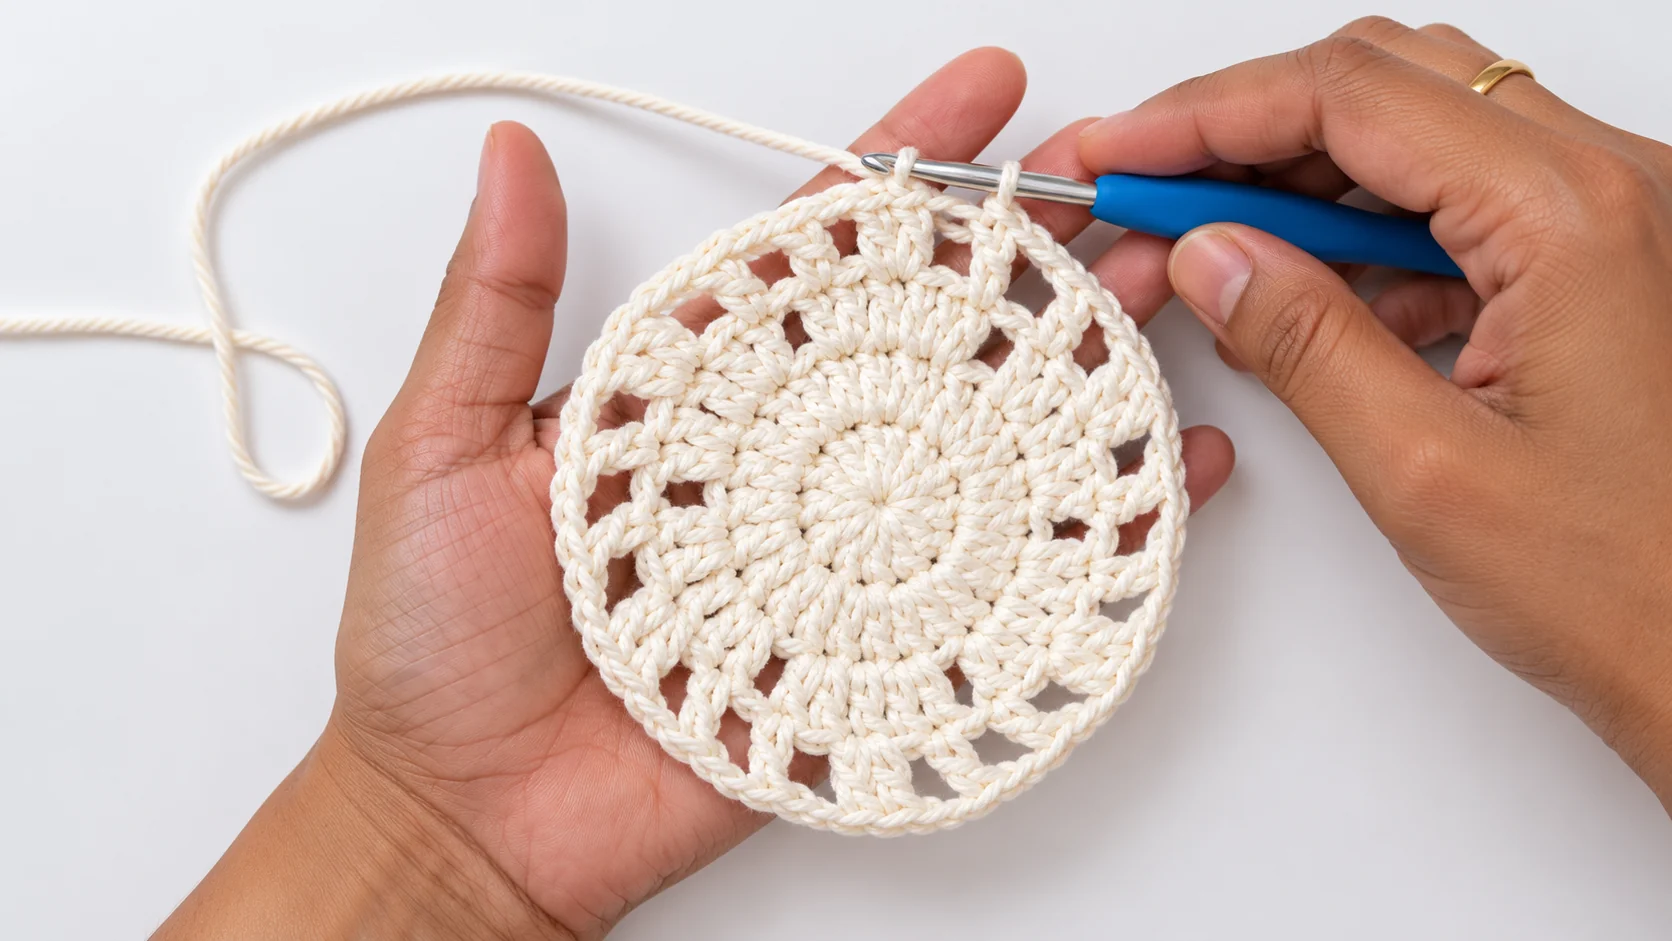
Step 6 — Finish and Shape the Coaster
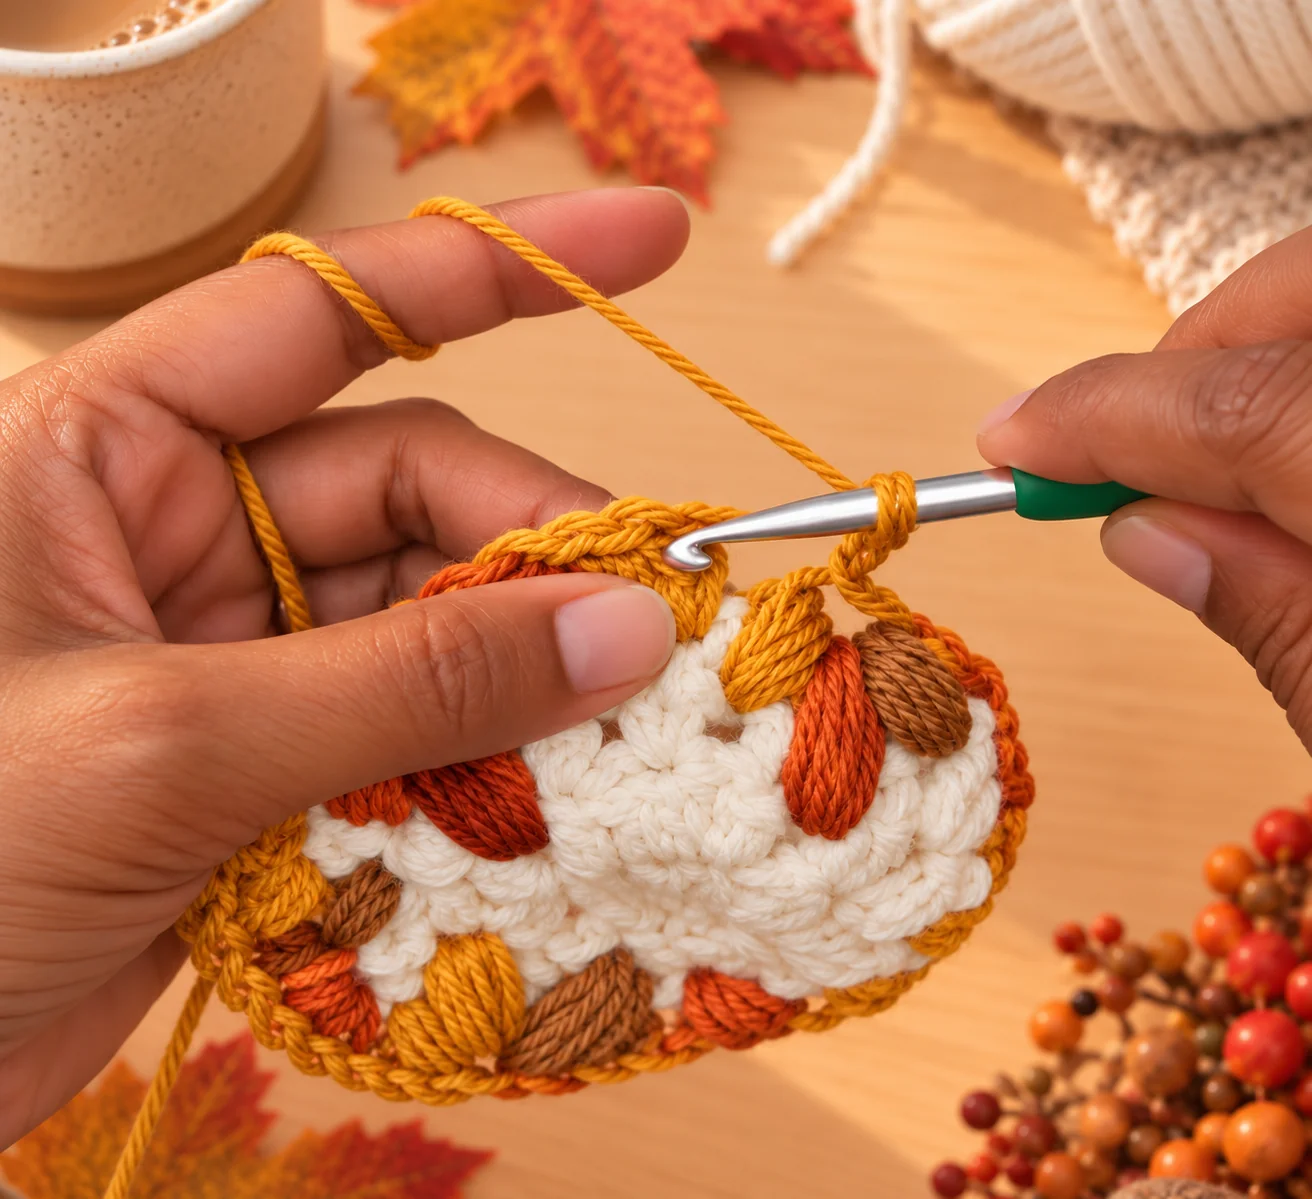
Your maple leaf crochet coaster is nearly done — once all six leaves are complete, fasten off and use a yarn needle to weave in every end on the back. Gently smooth the coaster flat. If the decorative round pulls too tightly and makes the edge curl, the tutorial allows ch 5 instead of ch 4 in Round 5 for extra room. Make this change consistently if needed.
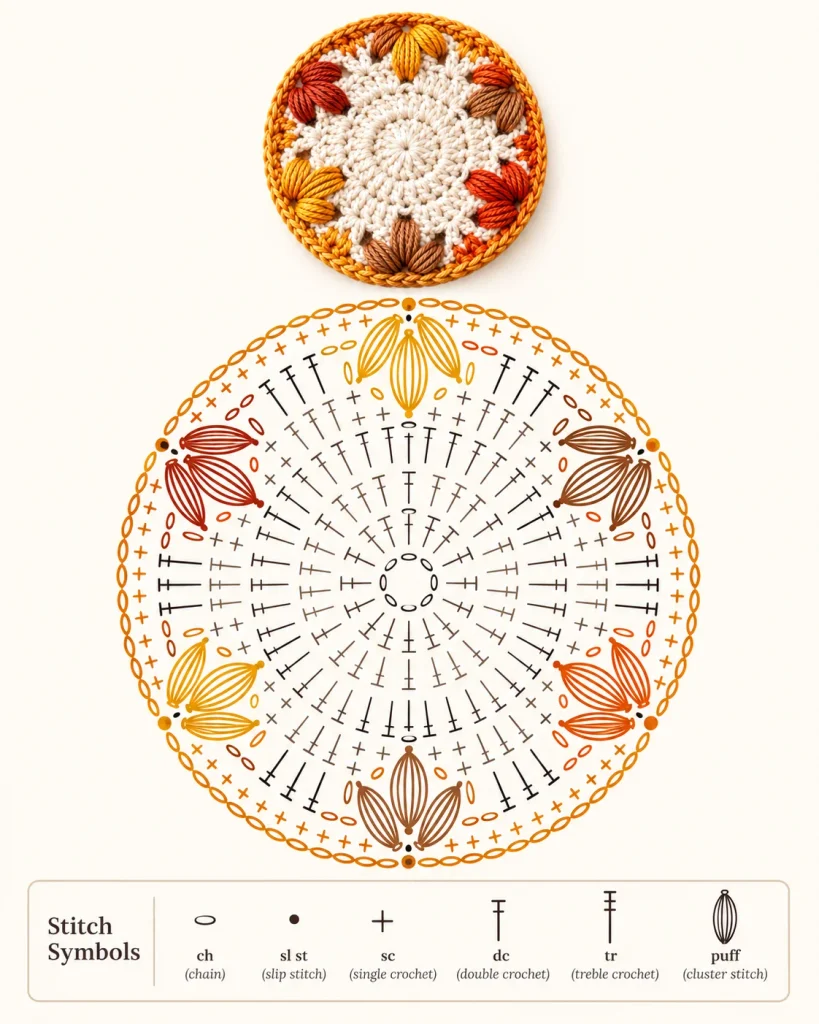
Crochet Coaster Stitch Diagram
A stitch diagram can help you follow the circle increases, the six groups, and the unusual three-anchor leaf clusters. Insert a verified chart here only after checking every symbol and attachment point against the instructions. Do not substitute a decorative AI chart as a stitch-accurate pattern.
Watch the Video Tutorial
Watch the full maple leaf crochet coaster pattern worked from start to finish:
Helpful Tips for a Flat Crochet Coaster
- Do not count the initial ch 2: In Rounds 1–3 it serves as a turning/buffer chain, not an extra double crochet.
- Use the middle stitch in every five-dc group: Round 4 places two dc in the third stitch, creating the central pair used in Round 5.
- Check all three leaf openings: Two are in Round 4 and the lower one is in Round 3.
- Keep elongated loops even: If some are much shorter, the leaf can become lopsided.
- Try ch 5 between motifs if curling: The video permits increasing the Round-5 chain arches from four to five if needed.
- Use cotton for drink coasters: It generally handles condensation better than acrylic yarn.
Questions About This Coaster Pattern
How many rounds does this crochet coaster use?
This maple leaf crochet coaster pattern has five joined rounds: four for the cream base and one for the six textured leaf motifs.
Why does my circle have gaps in Round 3?
The gaps are intentional. Each set of five double crochets is followed by a chain-one space, which later helps anchor the raised leaves.
How many yarn pull-ups are in each leaf?
Each leaf uses four extended yarn pull-ups in each of three spaces, for a total of twelve pull-ups closed together.
Can I make this coaster in just one color?
Yes. The construction works with one yarn color, although contrasting fall shades make the leaves stand out more clearly.
What if my coaster curls?
Keep the elongated leaf loops tall and consistent. If the outer round feels tight, try making five chains instead of four between leaf clusters, as suggested in the tutorial.
More Fall Crochet Inspiration
Pair this maple leaf crochet coaster with handmade fall decorations, or build your skills further with our magic ring tutorial and crochet basics guide. For more on choosing yarn weights and hook sizes, the Craft Yarn Council’s yarn weight standards are a handy reference.
Reviews
There are no reviews yet. Be the first one to write one.
Keep learning: New to a technique used here? See how to crochet a granny square and our beginner guide to crochet increases and decreases.