
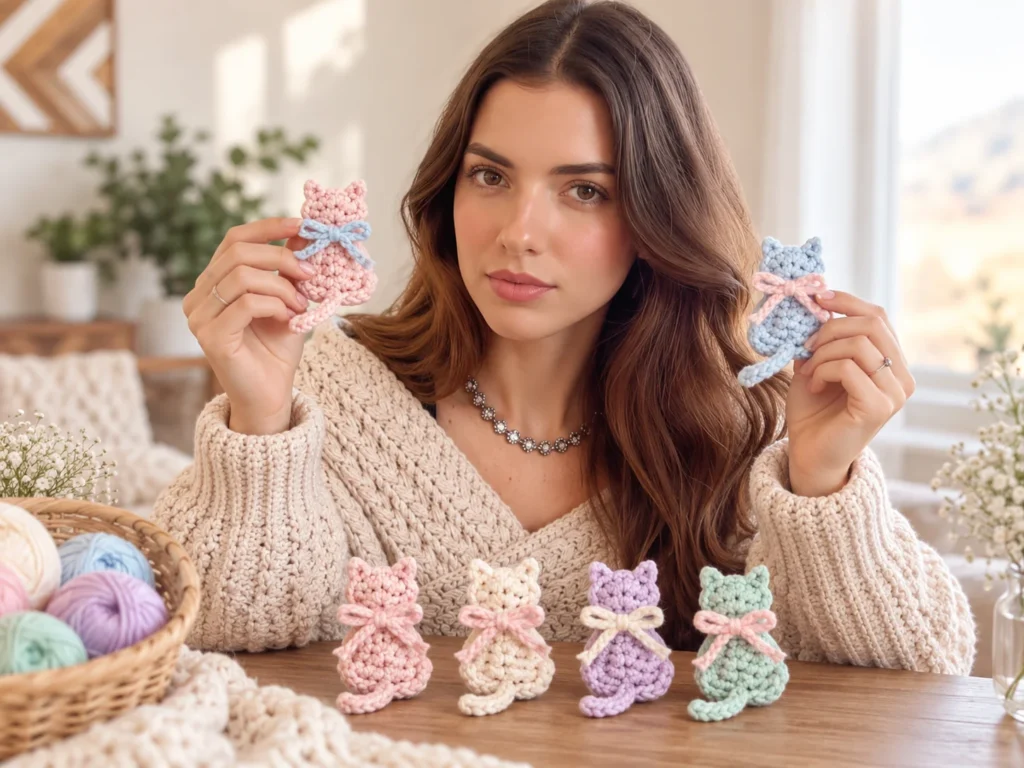
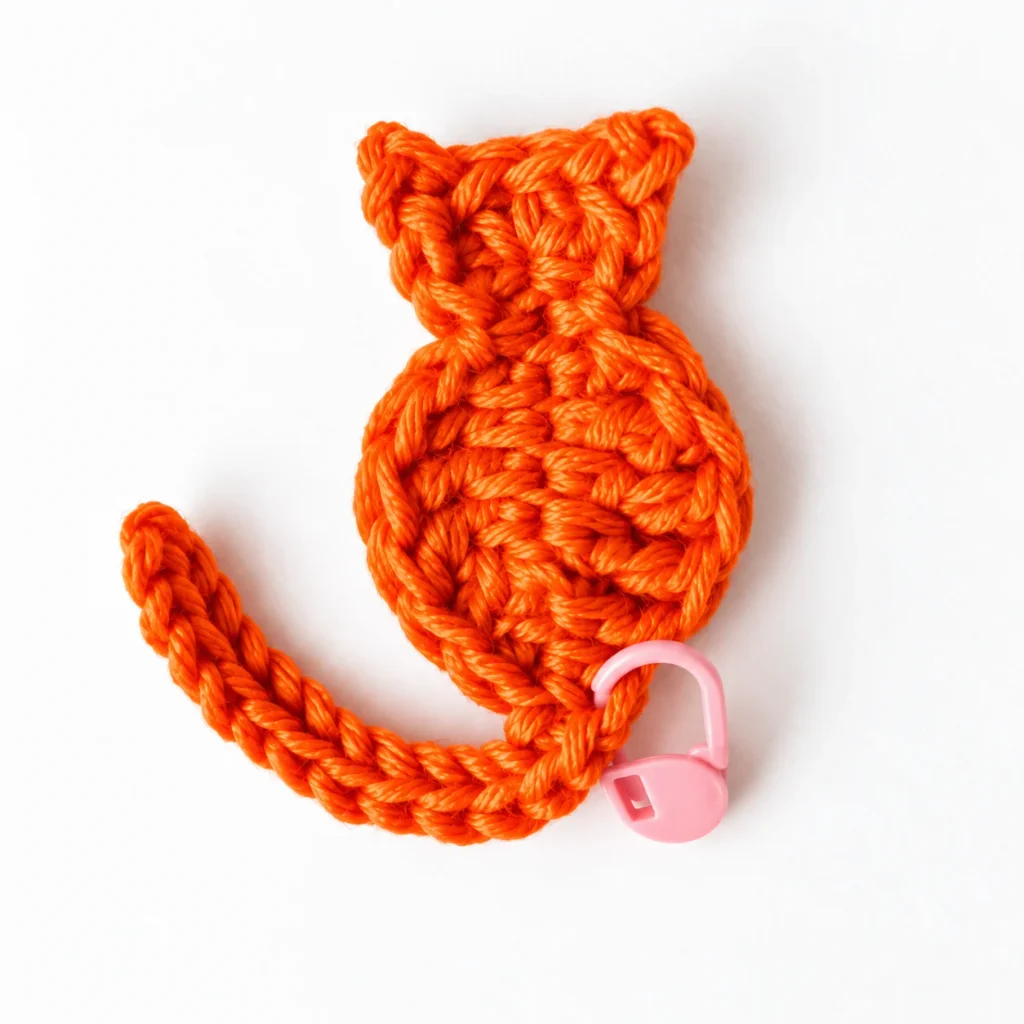
This free crochet cat applique pattern is worked in one continuous piece, straight from a single foundation chain — no separate pieces, no sewing them together afterward. Once you’ve made one, you’ll have a pattern you can stitch onto bags, sweaters, headbands, or turn into a brooch in under fifteen minutes.
New to shaping stitches? Our Basic Crochet Stitches guide covers everything you’ll use in this applique.
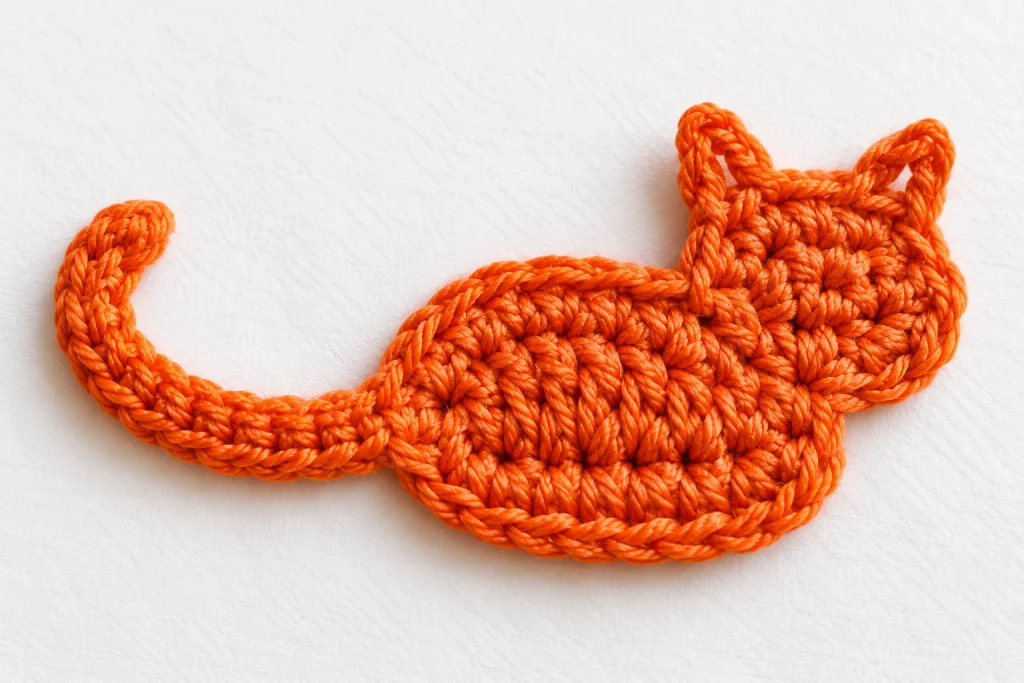
Materials for the Free Crochet Cat Applique Pattern
- 3.5mm crochet hook
- Orange cotton yarn (less than 2g; original sample used Rainbow Cotton 8/8, color 57)
- Stitch marker
- Darning needle
- Scissors
Crochet Abbreviations (US Terms)
- ch — chain
- sl st — slip stitch
- sc — single crochet
- hdc — half double crochet
- dc — double crochet
- tr — treble crochet
- st(s) — stitch(es)
Instructions inside parentheses are worked into the same stitch unless noted otherwise.
How This Pattern Is Built
You’ll work the tail first, build up one side of the body into the head and ears, then come back down the other side of the same foundation chain to finish the second side of the body. The whole cat comes off the hook as one connected shape.
Free Crochet Cat Applique Pattern
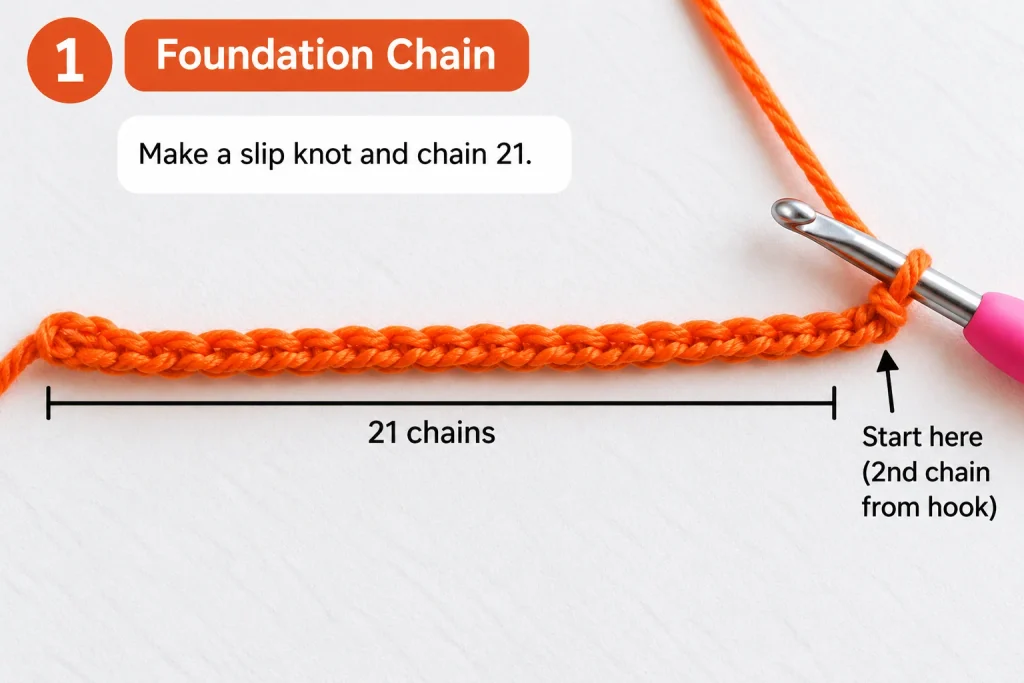
Foundation: Make a slip knot and ch 21.
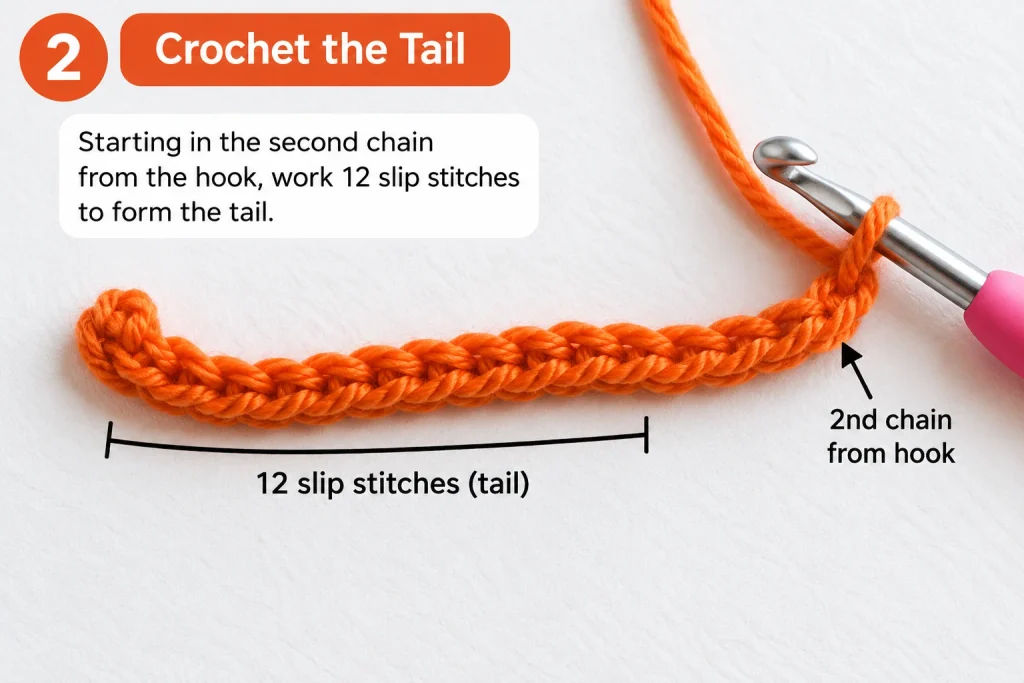
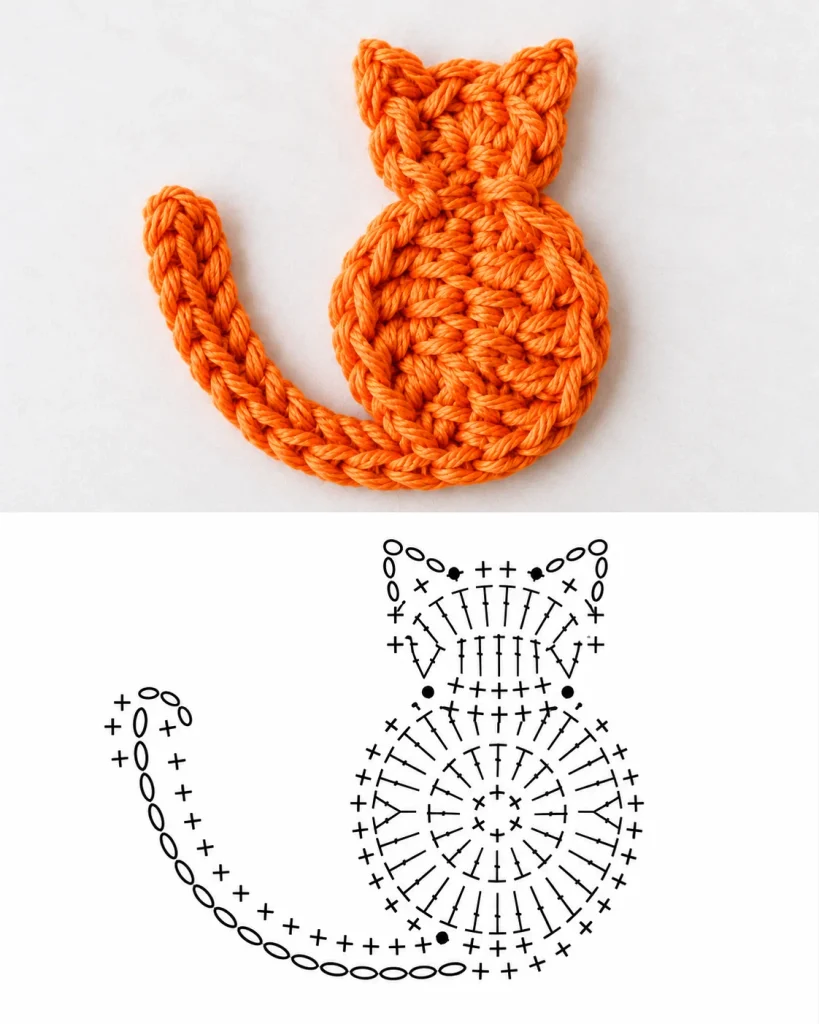
Round 1 (tail and first side of body): Starting in the 2nd ch from hook: sl st 12 (tail), hdc 1 (mark this stitch), dc 1, tr 3, dc 1, sl st 1 (first side of body).
Head and ears: In the last ch, work (2 dc, ch 3, sl st 1, 2 dc, ch 3, sl st 1, 2 dc). The two ch-3 loops form the ears. Secure each loop with a slip stitch at its base.
Continuing Round 1 (second side of body): Working back along the unused loops of the foundation chain: sl st 1, dc 1, tr 3, dc 1, hdc 1.
Fasten off, leaving a short yarn tail to weave in. Weave in both ends.
Watch the Crochet Cat Applique Video Tutorial
Follow along with this crochet cat applique video tutorial to see how to form the tail, shape the body, crochet the head and ears, and finish your applique.
Free Crochet Cat Applique Pattern: Step-by-Step Instructions
Add your own verified step-by-step crochet photos to the marked image positions below.
Step 1: Foundation Chain
Make a slip knot and chain 21. Keep your tension relaxed — you’ll be working into both sides of this chain, and a tight foundation makes that much harder.
Step 2: The Tail
Starting in the 2nd chain from your hook, work 12 slip stitches. This narrow row of slip stitches becomes the cat’s long tail.
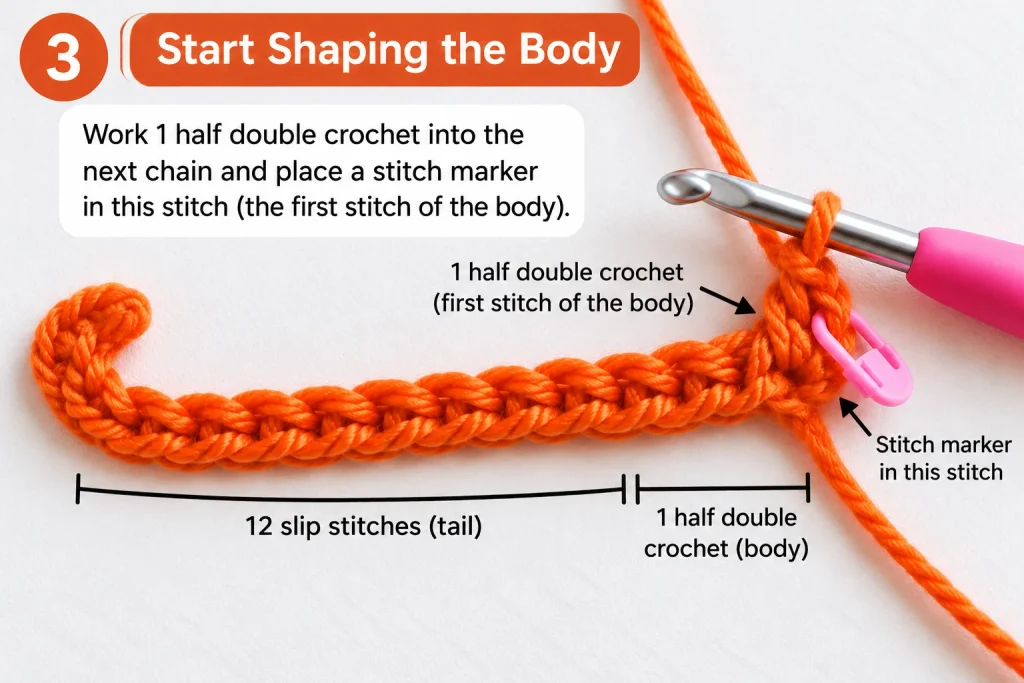
Step 3: Start Shaping the Body
Work 1 half double crochet into the next chain. Place a stitch marker in this stitch — that’s your landmark for where the tail ends and the body begins.
Step 4: Build the Body’s Curve
Work 1 double crochet, then 3 treble crochets, then 1 double crochet, and finally 1 slip stitch. The changes in stitch height shape the first side of the cat’s body.
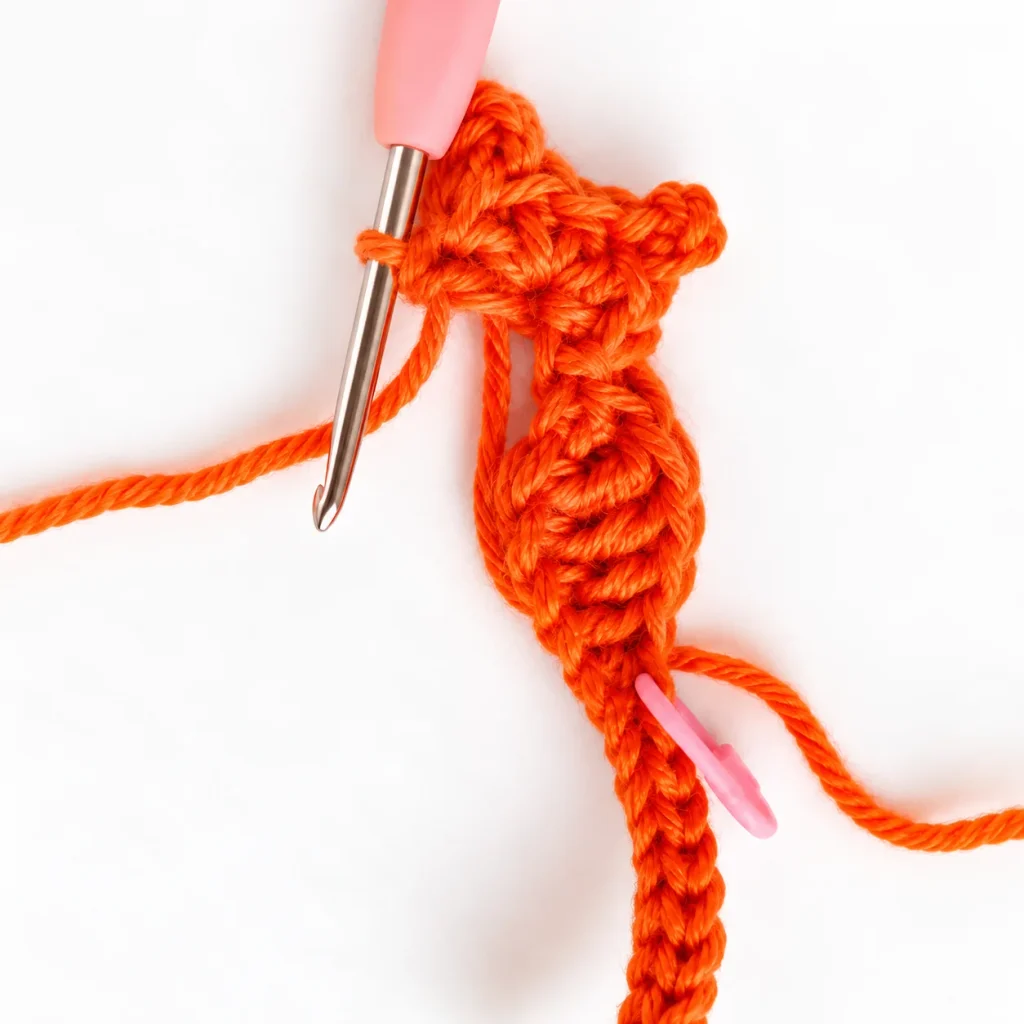
Step 5: Head and Ears
In the very last chain, work: 2 double crochets, chain 3, slip stitch to secure the first ear loop, 2 double crochets, chain 3, slip stitch to secure the second ear loop, and 2 double crochets. Both chain-3 loops form the cat’s ears.
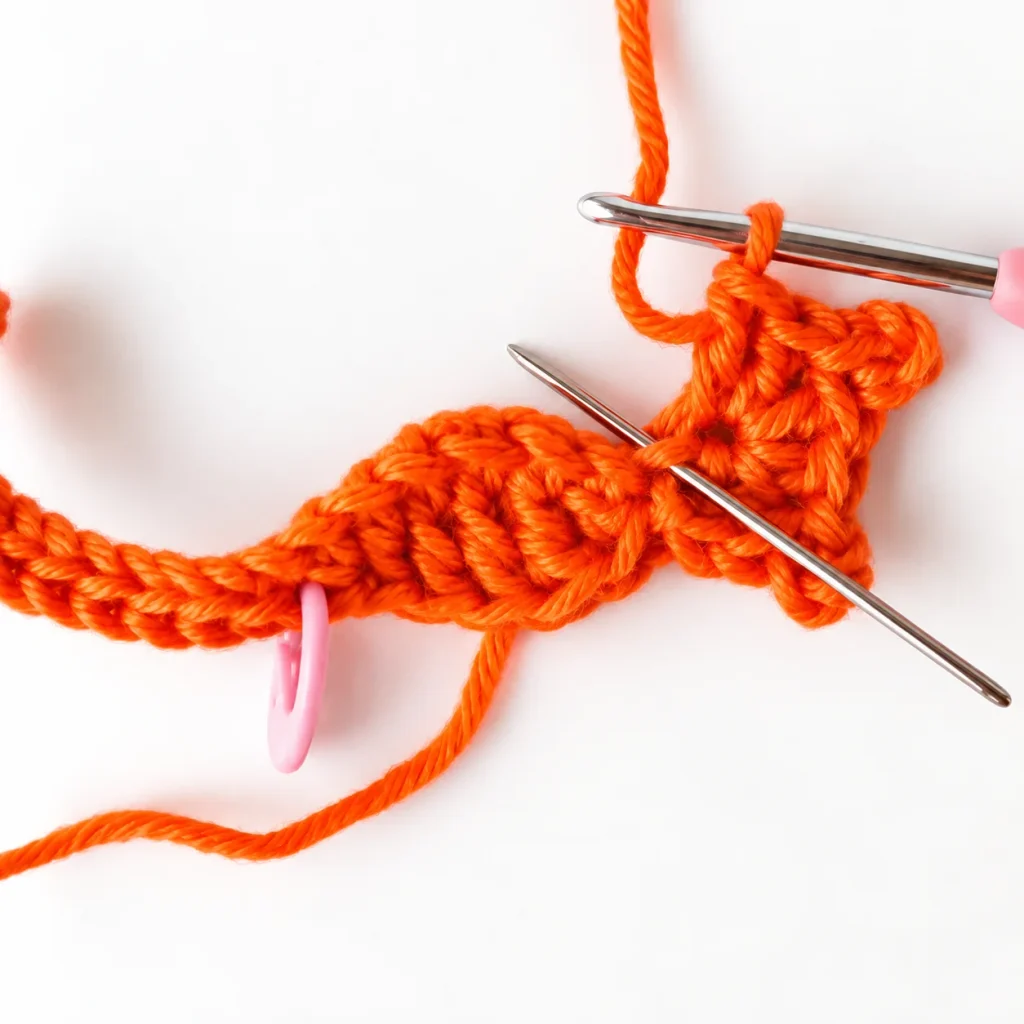
Step 6: Second Side of the Body
Continue into the unused loops along the opposite side of your foundation chain. Work 1 slip stitch, 1 double crochet, 3 treble crochets, 1 double crochet, and 1 half double crochet.
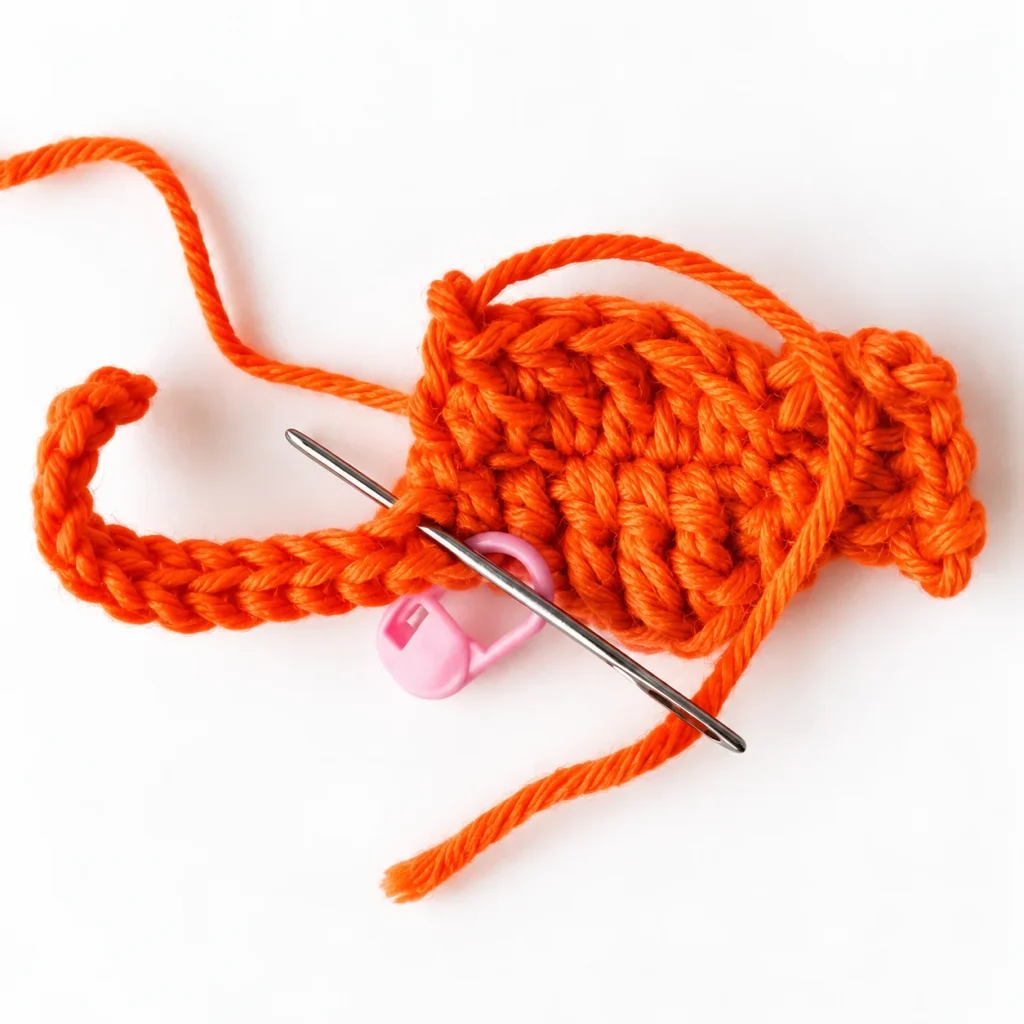
Step 7: Finish and Weave In
Cut your yarn, leaving a short tail. Thread it onto a darning needle and weave it through the back of nearby stitches to secure it, then do the same with your starting tail. Pull your stitch marker out — you’re done.
Crochet Coaster Stitch Diagram
Ideas for Using Your Crochet Cat Applique
- Sew it onto a handmade tote or market bag
- Add it to a sweater, cardigan, or beanie
- Turn it into a brooch with a pin backing
- Use it as a gift topper or card embellishment
- Stitch a few in different yarn colors for a set of coasters or appliques
Helpful Tips
- Keep your foundation chain a little loose — a tight chain is hard to work into on the second pass.
- The stitch marker is there to save you from losing count of where the tail ends and the body starts.
- If your ears look lopsided, check that both chain-3 loops are the same length before you slip stitch them closed.
- Block the finished applique flat under a light steam if it’s curling before you sew it on.
Frequently Asked Questions
Is there a free pattern for this crochet cat applique?
Yes — the full written pattern above is completely free, with every stitch and chain count included. No PDF download or Ravelry account is needed; you can follow it directly on this page.
Is this cat applique easy enough for a beginner?
Yes. It only uses basic stitches — chain, slip stitch, single crochet, half double crochet, double crochet, and treble crochet — worked in a straight sequence from one foundation chain. If you can make those stitches, you can make this applique.
Is there a step-by-step tutorial, not just the pattern?
Yes — scroll up to the “Step-by-Step Instructions” section, which breaks the pattern into seven numbered steps (foundation chain, tail, body shaping, head and ears, second side, and finishing), each explained in plain language alongside the written pattern.
Can I turn this into a crochet kitty for Halloween or other decorations?
Definitely. Work it in black yarn for a classic Halloween cat, or in any color to match a themed project. See the “Ideas for Using Your Crochet Cat Applique” section above for more ways to use it beyond Halloween.
Is there a video version of this tutorial?
Yes — the full video tutorial is right here on this page, further up above the Reviews section. Watch it alongside the written step-by-step instructions for the clearest picture of the technique.
What’s the difference between this and a “crochet kitty” applique?
Nothing — “cat applique” and “kitty applique” describe the same type of project: a small, flat crochet cat shape meant to be sewn onto bags, clothing, or other handmade items.
More Crochet Resources
For help with US stitch names, consult the Craft Yarn Council crochet abbreviations guide.
Reviews
There are no reviews yet. Be the first one to write one.