
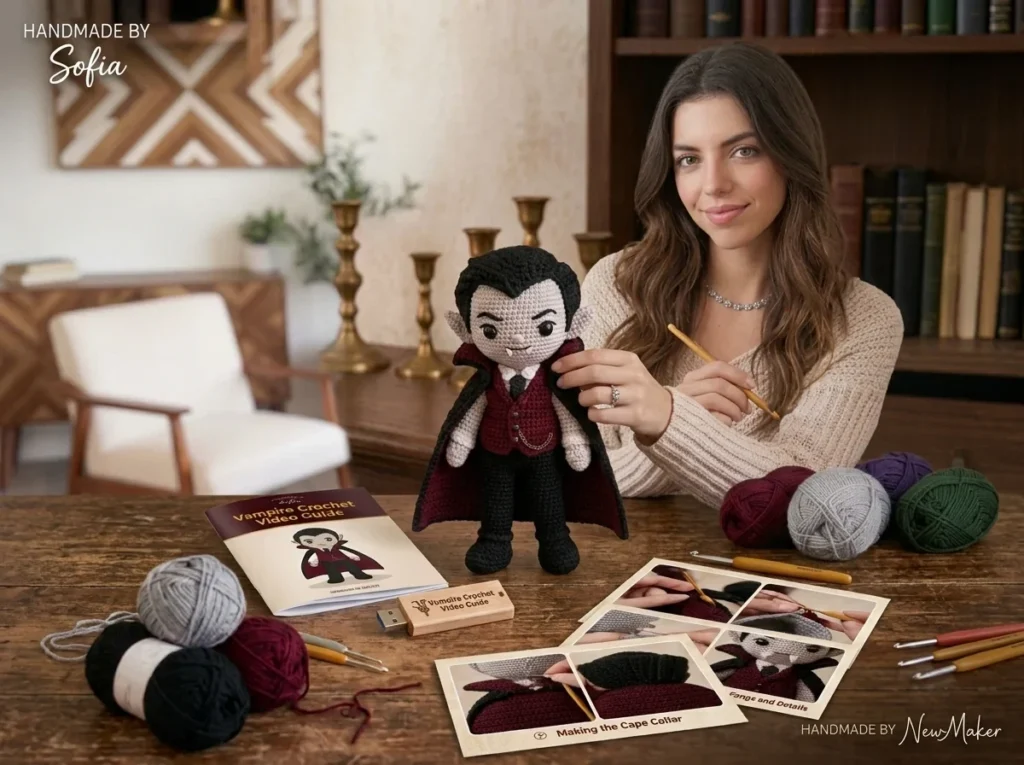
Halloween doesn’t have to mean spooky and scary — it can be cute too! This little vampire doll has a round, friendly face, a tiny cape, and just enough gothic charm to sit on a shelf all October long (or year-round, honestly, he doesn’t mind). This is an original Loop & Twine pattern, written for confident beginners who’ve made at least one amigurumi ball or two before.
Before You Start
- Read all the way through once before picking up your hook — it helps to know what’s coming, especially for the color changes on the body and cape.
- Everything is worked in a continuous spiral, so don’t slip stitch to join at the end of a round unless a step tells you to.
- Use a stitch marker in the first stitch of every round and move it up as you go — it’s the easiest way to keep your place.
- Stuff as you close each piece rather than trying to cram it all in at the end. Small handfuls added gradually give a much smoother, rounder shape.
Skill Level & Finished Size
- Skill level: Beginner–Easy (magic ring, single crochet, basic increases/decreases, sewing pieces together)
- Finished height: approx. 15 cm (6 in), standing
- Hook: 2.5 mm
- Gauge: not critical for amigurumi — just keep stitches tight enough that stuffing doesn’t peek through
Materials
- DK weight cotton yarn: pale gray (skin), black (hair, cape, shoes), deep purple (cape lining, collar), white (shirt collar)
- 2.5 mm crochet hook
- 6 mm safety eyes (or embroider them if this is for a small child)
- Polyester fiberfill
- Yarn needle + small amount of black embroidery floss (mouth, eyebrows)
- Stitch marker
Abbreviations (US terms)
MR magic ring · sc single crochet · inc increase (2 sc in same stitch) · dec invisible decrease · st(s) stitch(es) · rep repeat · FO fasten off
Worked in continuous spiral rounds throughout — don’t join unless a step says to.
New to the magic ring or invisible decrease? See our full magic ring guide and increase/decrease guide before starting.
Head (make 1, in gray)
- MR, 6 sc in ring (6)
- inc around (12)
- (sc, inc) rep around (18)
- (2 sc, inc) rep around (24)
- (3 sc, inc) rep around (30)
- –9: sc around, even (30)
- Place safety eyes between rounds 6–7, about 6 stitches apart
- 10: (3 sc, dec) rep around (24)
- 11: (2 sc, dec) rep around (18)
- 12: (sc, dec) rep around (12)
- Stuff firmly
- 13: dec around (6) — fasten off, leave a tail for sewing to the body
Body (make 1, black pants + gray shirt effect by color change)
- In gray: MR, 6 sc in ring (6)
- inc around (12)
- (sc, inc) rep around (18)
- –7: sc around, even (18)
- Switch to black
- 8–12: sc around, even (18)
- 13: (sc, dec) rep around (12)
- Stuff as you go
- 14: dec around (6) — fasten off, leave a tail
Arms (make 2, gray)
- MR, 5 sc in ring (5)
- –7: sc around, even (5)
- Light stuffing, flatten the last round slightly before fastening off — leave a tail for sewing to the body
Legs / Feet (make 2, black)
- MR, 6 sc in ring (6)
- inc around (12)
- –5: sc around, even (12)
- Stuff firmly (this is the foot — pack it well so the doll can stand)
- 6: (sc, dec) rep around (8)
- 7–10: sc around, even (8) — this is the leg
- Fasten off, leave a tail
Hair (make 1, black)
A simple flat cap of hair goes a long way toward selling the vampire look.
- MR, 6 sc in ring (6)
- inc around (12)
- (sc, inc) rep around (18)
- (2 sc, inc) rep around (24)
- sc around, even (24) — fasten off, leaving a long tail
- Lay the circle over the top of the head like a little beret and pin it in place before sewing so you can check the front hairline sits just above where the eyebrows will go
- Sew around the entire outer edge, then pinch a small point at the center front with a few extra stitches for a widow’s peak — the classic vampire hairline detail
Ears (make 2, gray)
- MR, 4 sc in ring (4)
- inc around (8)
- Fasten off, leave a tail. Pinch the base gently to give it a slight point before sewing on — that’s what makes it look vampire-y rather than teddy-bear-y.
Cape (make 1, black with purple edge)
- In black, chain 16
- Row 1: sc in 2nd ch from hook and each ch across (15 sts)
- Rows 2–6: ch 1, turn, sc in each st across (15 sts) — this builds the body of the cape
- Row 7: ch 1, turn, dec, sc across to last 2 sts, dec (13 sts)
- Row 8: repeat row 7 (11 sts)
- Fasten off, weave in ends
- Switch to purple: work one row of sc evenly around the entire outer edge for a contrast trim, then fasten off
Assembly
- Sew the head to the top of the body, keeping it centered
- Attach the arms to the sides of the body, roughly level with the color-change line
- Sew the legs to the bottom of the body so the doll can stand on its own — check balance before securing fully
- Sew the ears to the sides of the head, angled slightly outward, then sew the hair cap over the top so it just covers the top of the ears
- Embroider two small triangle fangs under the mouth line with white or cream floss, and add simple straight-line eyebrows angled inward for a classic “vampire brow”
- Drape the cape over the shoulders and tack it down at the collarbone on both sides — leave it loose at the back for movement
Finishing Touches & Troubleshooting
- Doll won’t stand up? Add more stuffing to the feet and the base of the legs — a soft foot is almost always the culprit, not the legs being too short.
- Head looks lopsided? Before sewing it on permanently, hold it in place with a couple of pins and check it from the front, both sides, and above — small adjustments are much easier before the yarn tail is woven in.
- Gaps at the neck or shoulders? Take a few extra whip stitches between the head and body — amigurumi seams benefit from being a little tighter than you’d expect.
- Cape sitting oddly? A light steam (hold an iron a few inches away, don’t press directly) helps the trim edge relax and lie flat.
- Always weave in your ends as you finish each piece rather than saving them all for last — future you will be grateful.
And that’s it — your own little vampire, ready for a Halloween shelf or a gift box. Because this is an original written pattern, feel free to tweak the colors (a rich burgundy cape instead of purple looks lovely too) and make him your own.
This pattern is free for personal use. If you make one, I’d love to see it — tag your finished doll and share the love for handmade crochet!
Keep learning: New to a technique used here? See our beginner guide to crochet increases and decreases, an invisible fasten off and how to make a magic ring.