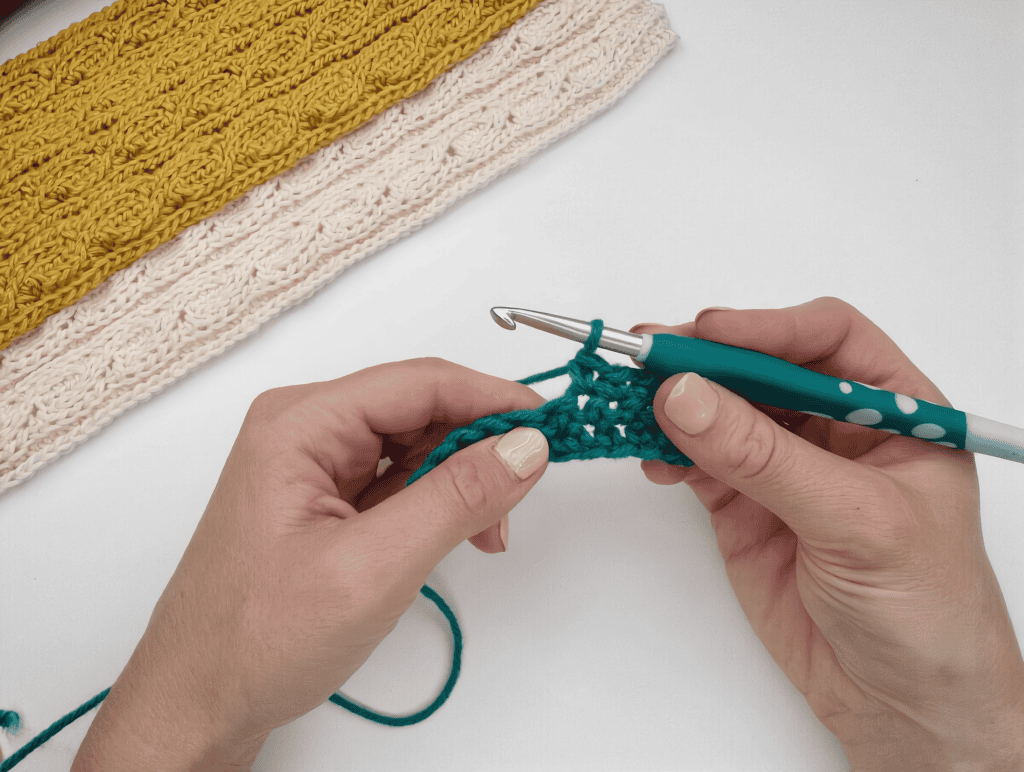
One hook. One ball of yarn. That’s honestly all it takes to make everything from snuggly blankets and market bags to adorable amigurumi animals. Crochet looks like magic, but it’s a skill anyone can pick up — no experience, expensive tools, or special talent required. This guide walks you through choosing your first supplies, holding the hook, learning the core stitches, and finishing your work neatly. Let’s get you stitching!
What Is Crochet?
Crochet is the craft of building fabric one loop at a time with a single hook. Knitting uses two needles and keeps many live loops active at once; crochet works with just one loop on the hook, which many beginners find easier to control (and much easier to undo when mistakes happen). That single-hook method is also why crochet is so versatile — dense warm fabric, delicate lace, 3D shapes, and rich textured stitches are all within reach.
What You Need Before You Start
Good news: the starter kit is tiny.
- Yarn — A smooth, medium-weight yarn (worsted/aran, category 4) in a light colour is ideal when you’re learning. You’ll see every stitch clearly, which makes practice far less frustrating. Save the dark, fuzzy, or splitty yarns for later.
- Hook — Match your hook to your yarn; the yarn label suggests a size. A 5mm (H-8) hook pairs nicely with worsted weight. An ergonomic handle is a nice comfort bonus for longer sessions.
- Nice-to-haves later — sharp scissors, stitch markers, and a tapestry needle for weaving in ends. None of these are needed on day one.
How to Hold Your Hook and Manage Tension
There is no single “correct” way to hold a hook — only what feels comfortable for your hands.
- Pencil grip — hold the hook like a pencil, resting between your thumb and fingers.
- Knife grip — hold it like a dinner knife, with your hand resting over the top.
The hook sits in your dominant hand. Your other hand has an equally important job: feeding the yarn and controlling its flow. Most crocheters wrap the working yarn around one or two fingers of the non-dominant hand to regulate how freely it moves.
That regulation is called tension (or gauge), and it’s the secret behind neat, even fabric. Pull too tight and you’ll struggle to insert your hook; too loose and your work turns holey and uneven. It feels awkward at first — almost everyone either strangles the yarn or lets it flop — but your hands settle into a rhythm with practice. Making a small gauge swatch before a real project helps you check your tension matches the pattern.
The Essential First Stitches
Learn these in order — each one builds on the last:
- Slip knot — the very first loop that anchors the yarn to your hook.
- Chain stitch (ch) — the foundation for nearly everything; rows are built on chains.
- Single crochet (sc) — short, dense, and the most-used stitch in patterns.
- Half double crochet (hdc) — a touch taller, with a lovely squishy texture.
- Double crochet (dc) — tall and quick to work; the backbone of blankets and shawls.
- Slip stitch (sl st) — the smallest stitch; used for joining rounds and moving across a row.
- Front post and back post double crochet — variations that create ribbing, cables, and rich texture.
Master these seven and you can honestly make most beginner patterns.
Reading Patterns: US vs UK Terms
One quirk that trips up almost every beginner: crochet terms differ between US and UK patterns. The same stitch has two names depending on where the pattern was written. Always check which terminology a pattern uses before starting — a UK “double crochet” is a US “single crochet,” not a US double!
This guide uses US terms. Here’s how the common terms compare:
| Abbreviation | US Term | UK Term |
|---|---|---|
| ch | chain | chain |
| sl st | slip stitch | slip stitch |
| sc | single crochet | double crochet (dc) |
| hdc | half double crochet | half treble crochet (htr) |
| dc | double crochet | treble crochet (tr) |
| tr | treble crochet | double treble crochet (dtr) |
| st(s) | stitch(es) | stitch(es) |
| rep | repeat | repeat |
| sp | space | space |
| yoh | yarn over hook | yarn round hook (yrh) |
Finishing Your Project Properly
Two final steps turn “homemade” into “handmade”:
- Weave in the ends — thread each yarn tail onto a tapestry needle and work it back through several stitches so nothing can unravel.
- Block your work — gently dampen the finished piece, pin it to the correct shape on a foam blocking mat, and let it dry. Blocking relaxes the stitches, evens out the fabric, opens up lace, and gives everything a professional finish.
Tips That Make Learning Easier
- Slow down — crochet is meant to be relaxing, not a race.
- Make small practice swatches of each stitch and keep them as a personal reference.
- If your work curls, your tension is likely too tight; if it’s full of gaps, too loose.
- Count your stitches at the end of every row until it becomes automatic.
- Expect your first attempts to look a little wonky — that’s not failure, that’s learning.
Easy First Projects to Try
Once your stitches feel comfortable, put them to work on something small and satisfying:
- A simple twisted ear warmer or headband — quick, useful, and great for practising tension.
- A baby blanket or lap blanket in basic stitches — repetitive rows build muscle memory fast.
- A triangle shawl worked in double crochet — one easy stitch pattern, big payoff.
- Granny squares joined into a cardigan or bag — teaches shaping, joining, and colour play.
Your Next Steps
You now know more than most people who say “I could never crochet.” Pick one easy pattern, grab your hook, and make something — then make another. Skills compound quickly: the stitch that feels impossible on Monday often feels automatic by Friday.